27.10.09

Daring Bakers - All french kisses!

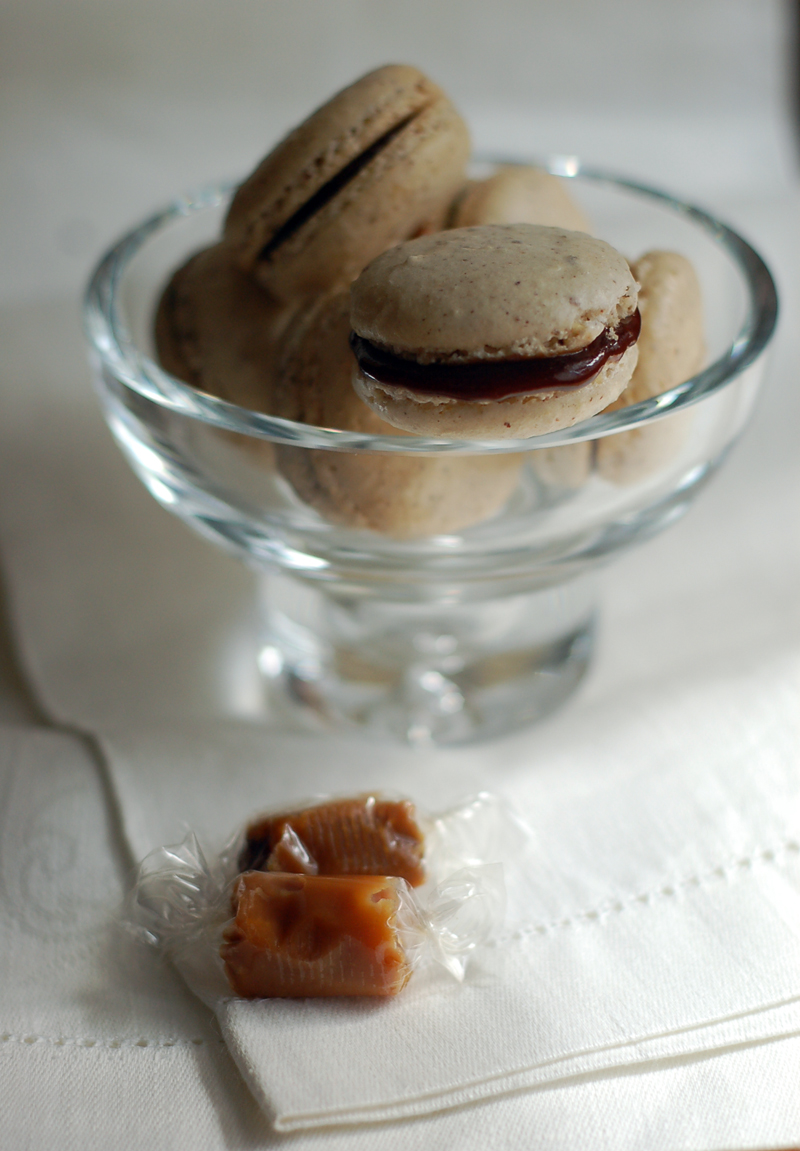
Hazelnut Macarons with Toffee

Lately I've been craving Paris. The symptoms are the usual: I miss walking the Seine and Boulevard Saint Michel, entering the bookshops and buying cookbooks eventually. I badly miss my favourite bistrots and the street vendors. I even miss the parisians! I daydream of crispy croissants, pain au raisins et café au lait, hot chocolate and... macarons. The perfect way to get me to Paris without leaving home is to bring Paris to me, all packed and arranged in a colourful and full flavoured macaron!

Macarons were on my list for quite a while. For some reason, I felt a bit scared every time I'd come across Helen's recipes - bookmarked since always from Tartelette - so I never got to try them. The 2009 October Daring Bakers’ challenge was brought to us by Ami S. She chose macarons from Claudia Fleming’s The Last Course: The Desserts of Gramercy Tavern as the challenge recipe. What a wonderful choice! Because I feared disaster (and after reading other fellow Daring Bakers experiences), I've decided to go with Helen's recipe with a few adjustments of my own as I wanted to use hazelnuts and toffee filling.

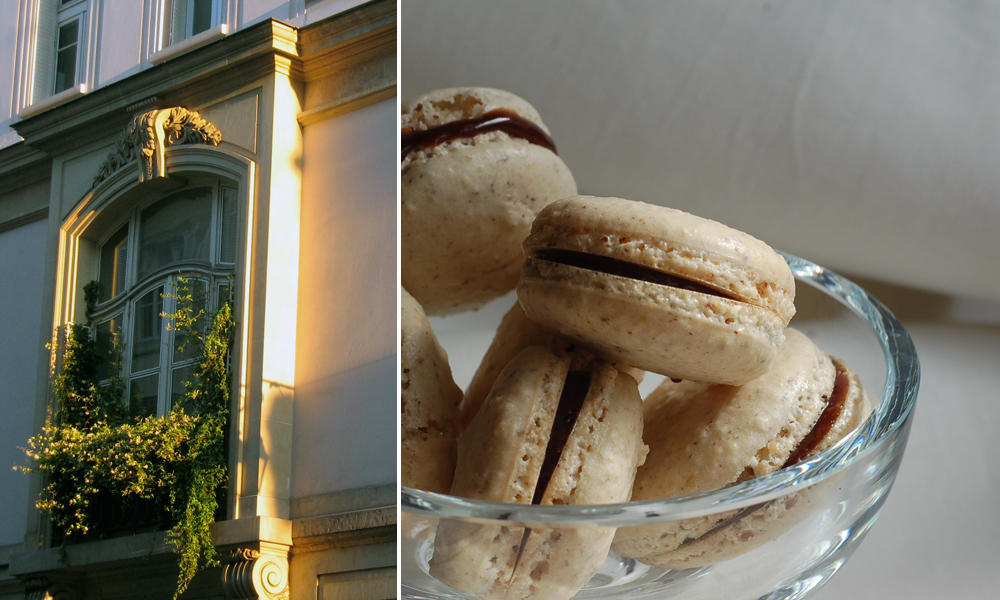
Hazelnut macarons & Paris

Hazelnut Macaron with Toffee filling

Lightly adapted from Claudia Fleming’s The Last Course: The Desserts of Gramercy Tavern and Helen's Pecan Pie Macarons

180 grs confectioners’ (icing) sugar
60 grs almond flour
55 grs hazelnut flour
35 grs granulated sugar
3 egg whites (about 90 grs), at room temperature

It's important to use aged egg whites. The day before making the macarons, separate the eggs. Leave the whites on the counter (if planning to use only in 48h or longer, keep in the fridge).

Combine the confectioners’ sugar, hazelnut and almond flour in the bowl of a food processor and grind until nuts are reduced to fine powder. Beat the egg whites until they hold soft peaks. Slowly add the granulated sugar and beat until the mixture holds stiff peaks. Add a third of the almond flour mixture into the meringue and fold gently to combine. Mix in the remaining almond flour. Don’t overfold, but fully incorporate your ingredients. [Helen's advice: Give quick strokes at first to break the mass and slow down.The whole process should not take more than 50 strokes. Test a small amount on a plate: if the tops flattens on its own you are good to go. If there is a small beak, give the batter a couple of turns.]
Spoon the mixture into a pastry bag fitted with a plain tip or use a Ziploc bag with a corner cut off. Pipe small rounds of batter (2.5 cm) onto baking sheets lined with nonstick liners (or parchment paper).

Preheat the oven to 150ºC (300ºF). Let the piped shells rest half an hour to an hour before baking. Bake the macaroon for 15-20 minutes (depending on size). Remove the pan from the oven and let cool slightly before gently remove the shelld. Cool completely on a rack before filling.

For the filling:

50g salted butter
125 grs light brown sugar
125 grs golden syrup
125 ml double cream
1/2 tsp vanilla extract

In a saucepan, mix all the ingredients. Boil until thickened (5 minutes), stirring occasionally. Let cool before filling the macarons.

Notes: I aged my egg whites for 3 days in the fridge. I should have sifted my hazelnut and almond flour. Unfortunately I haven't and that made the batter look a bit uneven but it didn't really matter in the final result. I let the piped shells rest half an hour to an hour before baking. I think that made all the difference as the second (and final) batch worked even better than the first. I used both a silicon mat and lined baking sheet with parchment paper with good results - nothing to report, the shells lifted easily with the aid of a spatula.

Visit the Daring Bakers blogroll to see all the macarons we baked!

16.10.09

When all else fails...

Hearty Seven-Grain Bread

When all else fails, I cook.

Some people go out after a god-awful day and slam a tennis ball around or jog their joints to pieces on a fitness course. I had a friend in Coral Gables who would escape to the beach with her folding chair and burn off her stress with sun and a slightly pornographic romance she wouldn't have been caught dead reading in her professional world—she was a district court judge. Many of the cops I know wash away their miseries with beer at the FOP lounge.

I've never been particularly athletic, and there wasn't a decent beach within reasonable driving distance. Getting drunk never solved anything. Cooking was an indulgence I didn't have time for most days, and though Italian cuisine isn't my only love, it has always been what I do best.


Even if I identify completely with the idea, these aren't my words. In fact they belong to a literature character, not a real person - although I suspect Patricia Cornwell lends a bit of her soul when she gives voice to Dr. Kay Scarpetta in her first novel, Postmortem. Scarpetta is a Chief Medical Examiner with a great love for food. And believe me, the lady can cook! I became hooked on Scarpetta's series not long ago because of these 6 words - When all else fails, I cook. Rephrasing slightly and it couldn't describe my feelings better - When everything fails, I bake some bread.

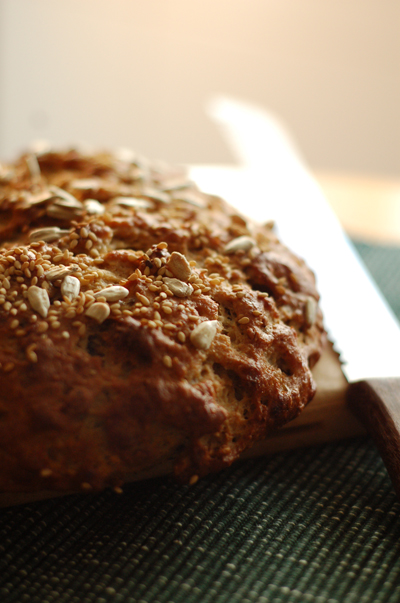
Hearty Seven-Grain Bread

Hearty Seven-Grain Bread
Lightly adapted from Patricia Cornwell and Marlene Brown, Food to Die For - Secrets from Kay Scarpetta's Kitchen

Makes 2 loafs

1/2 cup (50 grams) rye flour
2 Tbsp chopped walnuts, toasted
1/2 cup (40 grams) quick-cooking oats
1/4 cup sunflower seeds
1/4 cup (15 grams) toasted wheat germ
3 Tbsp sesame seeds, toasted
2 1/2 cups (325 grams) bread flour, extra to dust
1 1/2 cup (180 grams) whole wheat flour
2 tsp dry yeast
2 cups (500 ml) whole milk
1/4 cup (60 ml) honey
1/4 cup (50 grams) salted butter
2 tsp salt

for the crust:
1 egg white, lightly beaten
1 Tbsp water
Sesame seeds and/or sunflower seeds for sprinkling

In a small bowl, mix together the rye flour, walnuts, oats, sunflower seeds, wheat germ, and sesame seeds. Set aside.

In a saucepan, heat milk, butter, and honey until slightly melted and combined. Remove from heat. Set aside.

In a large bowl, combine the bread flour and the whole wheat flour with the yeast. Make a hole in the middle. Add the milk mixture mixing with a fork (if using a stand mixer, pour the milk slowly and steadily while mixing, with the hook attachment). Add the rye flour mixture. Work the dough for 10 minutes or until it's elastic and smooth. Add extra warm milk or water if the dough is too dry (1 tablespoon at a time). Put the dough in an oiled bowl, cover and let rise in a warm, dry place for 1 hour or until not quite doubled in size. Turn the dough onto a lightly dusted surface, and punch it. Set aside for a couple of minutes to rest. Work the dough for another 5 minutes. Cover with a kitchen towel and let rest for 10 minutes. Shape the dough into 2 rounded loafs. Place each ball on a greased baking sheet or a silicone mat. In a small bowl, beat lightly the egg with the water. Brush the loafs, and sprinkle with the seeds. Cover, and let rise again for 35-45 minutes, until not quite doubled in size.

Preheat oven to 180ºC (375ºF). Bake for 25-30 minutes. Remove and allow to cool slightly on a wire rack. Serve the bread warm or at room temperature with butter or olive oil.

Today is the World Bread Day, a fantastic initiative to celebrate the best food in the entire world - bread! This is my contribute to this lovely day. The World Bread Day 2009 is brilliantly organized by Zorra.

Stay tuned for the roundup, I'll post the link here.

9.10.09

Going Portuguese

Stuffed Squids

The sea. Always the sea. If you look at Portugal's history it's always about the beauty of our surrounding coasts, and all the dreams of faraway lands that come with it. The exhibition “Encompassing the Globe: Portugal and the World in the 16th and 17th Centuries” is about that too. Or as Holland Cotter put it in the NY Times: A version of the Internet was invented in Portugal 500 years ago by a bunch of sailors with names like Pedro, Vasco and Bartolomeu. The technology was crude. Links were unstable. Response time was glacial. (A message sent on their network might take a year to land.) <= It's kinda of faster today.

Portuguese people have historically been influenced by so many cultures that is not surprising our food shows a large variety of flavours, with exotic spices from India or Brazil playing their role, and of course fish being a staple. Although bacalhau (cod fish) and sardines are the most popular choices from the sea, stuffed squid accompanied by boiled potatoes are a very traditional dish in the Portuguese cuisine, both in Lisbon and the Algarve.

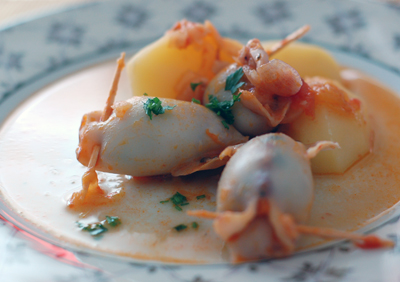
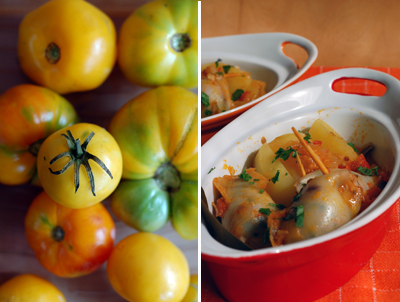
Suffed Squids & yellow tomatoes

Stuffed Squid Lisbon-style
Lulas recheadas com Chouriço à Lisbonense

Serves 4

12 large squid (about 600 grs), whole but skin removed and eyes discarded
10-12 slices (about 100 grs) chouriço, finely chopped
1 Tbps olive oil
1 garlic clove, chopped
1 small onion, chopped
2 small tomatoes (I used yellow tomatoes)
1 small red chili, seeds removed and chopped
2 small carrots
2 Tbsp kalamata olives, chopped
1 Tbps parsley, chopped
salt and black pepper

for the sauce:
1 large onion, chopped
1 garlic clove, chopped
2 Tbps olive oil
1 bay leaf
3 large ripe tomatoes
1/2 glass (100 ml) white wine (dry is best)
salt and black pepper

500 grs new potatoes, boiled in salted water
1 Tbps parsley, chopped

Prepare the squid. Reserve the tubes and chop the tentacles. In a small saucepan, heat 1 Tbsp olive oil. Sautee onion and garlic for a couple of minutes. Add the tentacles, carrots, chili and chouriço and stir. Mix in the chopped yellow tomatoes and cook with a lid on for 3 minutes. Add olives and chopped parley. Season with salt and pepper. Cool almost completely. With a coffee spoon, stuff the squid, filling the tubes about 2/3 full. Close with a toothpick.

Boil the potatoes in salted water for 5 minutes. Drain and reserve.

For the sauce, place onion, garlic and olive oil in a large saucepan. Add tomatoes and bay leaf. Cook with a lid on for 5 minutes. Put the stuffed squid in the saucepan. Season with salt and pepper. Allow to boil. Refresh with white wine. Remove the lid and cook until reduced and squid are tender. Sprinkle with parsley and serve with the potatoes.

Notes: Larger squid are best for stuffing, as it's not so difficult to fill them.

5.10.09

Freud, America & a green salad

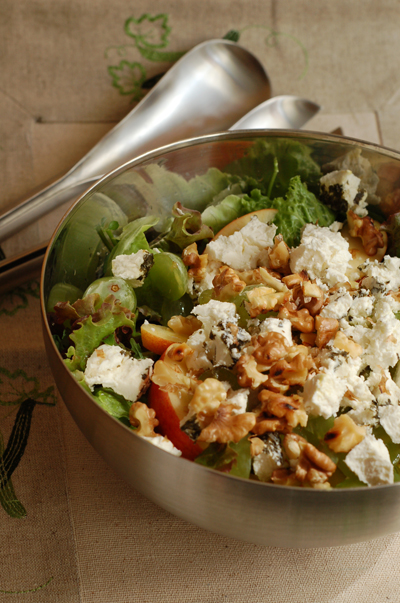
Waldorf Salad

Perhaps it was my recent trip to New York that made me grab Jed Rubenfeld's book The interpretation of murder again. The story is based on real facts and takes place across Manhattan in the beginning of the 20th century during Sigmund Freud’s only visit to America with his protégé Carl Yung. The famous analyst is asked to help with a patient to solve a mysterious crime. The Interpretation of Murder leads readers through New York high society, as well a few dark places and some homey ones. At some point, Rose - Brill's wife (Freud's translator in America) - serves an Waldorf salad to her guests without great success...

This salad first appearance was at the Waldorf Astoria Hotel in 1893 and became an american classic, with more versions than chefs. According to some, this apple celery salad with grapes and nuts was created by the well-known French chef Auguste Escoffier as a gift to Oscar Tschirky, the hotel's chef and his good friend.

Waldorf Salad

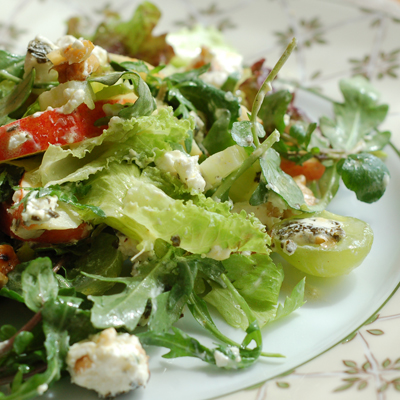
Waldorf Salad
Lightly adapted from Jamie's America

Serves 2

75 grams (about 4 cups) mixture green salad - watercress, frisée, rocket
1 cup green grapes, deseeded and halved
2 celery sticks, peeled and chopped diagonally
1 red apple, sliced
75 grams soft goats cheese, crumbled
1/2 cup walnuts, aquecidas na frigideira e grosseiramente partidas

for the dressing:
1/2 tsp Dijon mustard
1 Tbsp red wine vinegar
olive oil (about 3 Tbsp)
1/2 - 1 Tbsp yogurt
parsley, finely chopped
'flor de sal' and black pepper

In large bowl, place watercress, frisée, rocket or any greens you're using. Add the grapes and the celery. Use a glass jar with a lid to make the dressing. Place all the ingredients and shake vigorously. Pour over the salad. Add the apple and the cheese and garnish with the nuts. Serve with a drizzle of extra olive oil if desired.

27.9.09

Daring Bakers - Gone with the wind!

Vol au Vent

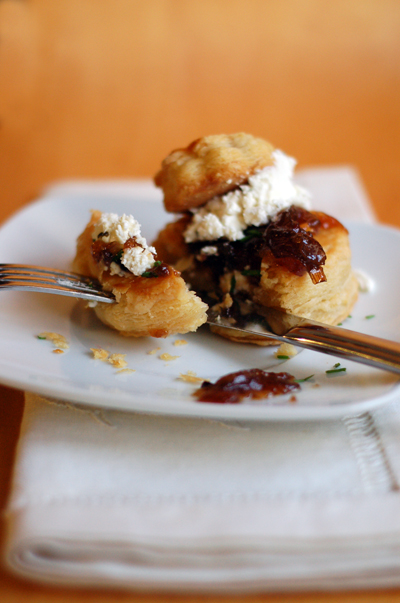
Vol au Vent means literally 'windblown'. These little treats are so light and crisp you could almost make them fly with a whisper. And if you're using homemade puff pastry you're sure to have whispered a lot whilst making it, not to mention a little cursing! At least I did. September has been HOT in Lisbon. I'm not complaining about this - well, I actually am... It's not the weather itself but the weather when dealing with a block of butter that's suppose to be soft enough to flow freely and cold enough to layer properly. Meaning I had like 2 minutes to work my way with the turns. In the end, although my kitchen was a bit of a mess, the pastry was nice and the all process went smoother than expected.

The September 2009 Daring Bakers' challenge was hosted by Steph of A Whisk and a Spoon. She chose the French treat, Vols-au-Vent based on the Puff Pastry recipe by Michel Richard from the cookbook Baking With Julia by Dorie Greenspan.
Vol au Vent

Vols au Vent

You will need:
-well-chilled puff pastry dough (recipe below)
-egg wash (1 egg or yolk beaten with a small amount of water)
-your filling of choice

Line a baking sheet with parchment and set aside.

Using a knife or metal bench scraper, divided your chilled puff pastry dough into three equal pieces. Work with one piece of the dough, and leave the rest wrapped and chilled. (If you are looking to make more vols-au-vent than the yield stated above, you can roll and cut the remaining two pieces of dough as well…if not, then leave refrigerated for the time being or prepare it for longer-term freezer storage. See the “Tips” section below for more storage info.)

On a lightly floured surface, roll the piece of dough into a rectangle about 1/8 to 1/4-inch (3-6 mm) thick. Transfer it to the baking sheet and refrigerate for about 10 minutes before proceeding with the cutting.

Using a ¾-inch cutter for small vols-au-vent, or a 2- to 2.5-inch round cutter for large, cut centers from half of the rounds to make rings. These rings will become the sides of the vols-au-vent, while the solid disks will be the bottoms. You can either save the center cut-outs to bake off as little “caps” for you vols-au-vent, or put them in the scrap pile.

Dock the solid bottom rounds with a fork (prick them lightly, making sure not to go all the way through the pastry) and lightly brush them with egg wash. Place the rings directly on top of the bottom rounds and very lightly press them to adhere. Brush the top rings lightly with egg wash, trying not to drip any down the sides (which may inhibit rise). If you are using the little “caps,” dock and egg wash them as well.

Refrigerate the assembled vols-au-vent on the lined baking sheet while you pre-heat the oven to 400ºF (200ºC). (You could also cover and refrigerate them for a few hours at this point.)

Once the oven is heated, remove the sheet from the refrigerator and place a silicon baking mat (preferred because of its weight) or another sheet of parchment over top of the shells. This will help them rise evenly. Bake the shells until they have risen and begin to brown, about 10-15 minutes depending on their size. Reduce the oven temperature to 350ºF (180ºC), and remove the silicon mat or parchment sheet from the top of the vols-au-vent. If the centers have risen up inside the vols-au-vent, you can gently press them down. Continue baking (with no sheet on top) until the layers are golden, about 15-20 minutes more. (If you are baking the center “caps” they will likely be finished well ahead of the shells, so keep an eye on them and remove them from the oven when browned.)

Remove to a rack to cool. Cool to room temperature for cold fillings or to warm for hot fillings.

Fill and serve.

*For additional rise on the larger-sized vols-au-vents, you can stack one or two additional ring layers on top of each other (using egg wash to "glue"). This will give higher sides to larger vols-au-vents, but is not advisable for the smaller ones, whose bases may not be large enough to support the extra weight.

*Although they are at their best filled and eaten soon after baking, baked vols-au-vent shells can be stored airtight for a day.

*Shaped, unbaked vols-au-vent can be wrapped and frozen for up to a month (bake from frozen, egg-washing them first).

Michel Richard’s Puff Pastry Dough

Baking with Julia by Dorie Greenspan
Yield: 2-1/2 pounds dough

Ingredients:
2-1/2 cups (12.2 oz/ 354 g) unbleached all-purpose flour
1-1/4 cups (5.0 oz/ 142 g) cake flour
1 tbsp. salt (you can cut this by half for a less salty dough or for sweet preparations)
1-1/4 cups (10 fl oz/ 300 ml) ice water
1 pound (16 oz/ 454 g) very cold unsalted butter

plus extra flour for dusting work surface

Mixing the Dough:

Check the capacity of your food processor before you start. If it cannot hold the full quantity of ingredients, make the dough into two batches and combine them.

Put the all-purpose flour, cake flour, and salt in the work bowl of a food processor fitted with a metal blade and pulse a couple of times just to mix. Add the water all at once, pulsing until the dough forms a ball on the blade. The dough will be very moist and pliable and will hold together when squeezed between your fingers. (Actually, it will feel like Play-Doh.)

Remove the dough from the machine, form it into a ball, with a small sharp knife, slash the top in a tic-tac-toe pattern. Wrap the dough in a damp towel and refrigerate for about 5 minutes.

Meanwhile, place the butter between 2 sheets of plastic wrap and beat it with a rolling pin until it flattens into a square that's about 1" thick. Take care that the butter remains cool and firm: if it has softened or become oily, chill it before continuing.

Incorporating the Butter:

Unwrap the dough and place it on a work surface dusted with all-purpose flour (A cool piece of marble is the ideal surface for puff pastry) with your rolling pin (preferably a French rolling pin without handles), press on the dough to flatten it and then roll it into a 10" square. Keep the top and bottom of the dough well floured to prevent sticking and lift the dough and move it around frequently. Starting from the center of the square, roll out over each corner to create a thick center pad with "ears," or flaps.

Place the cold butter in the middle of the dough and fold the ears over the butter, stretching them as needed so that they overlap slightly and encase the butter completely. (If you have to stretch the dough, stretch it from all over; don't just pull the ends) you should now have a package that is 8" square.

To make great puff pastry, it is important to keep the dough cold at all times. There are specified times for chilling the dough, but if your room is warm, or you work slowly, or you find that for no particular reason the butter starts to ooze out of the pastry, cover the dough with plastic wrap and refrigerate it . You can stop at any point in the process and continue at your convenience or when the dough is properly chilled.

Making the Turns:

Gently but firmly press the rolling pin against the top and bottom edges of the square (this will help keep it square). Then, keeping the work surface and the top of the dough well floured to prevent sticking, roll the dough into a rectangle that is three times as long as the square you started with, about 24" (don't worry about the width of the rectangle: if you get the 24", everything else will work itself out.) With this first roll, it is particularly important that the butter be rolled evenly along the length and width of the rectangle; check when you start rolling that the butter is moving along well, and roll a bit harder or more evenly, if necessary, to get a smooth, even dough-butter sandwich (use your arm-strength!).

With a pastry brush, brush off the excess flour from the top of the dough, and fold the rectangle up from the bottom and down from the top in thirds, like a business letter, brushing off the excess flour. You have completed one turn.

Rotate the dough so that the closed fold is to your left, like the spine of a book. Repeat the rolling and folding process, rolling the dough to a length of 24" and then folding it in thirds. This is the second turn.

Chilling the Dough:

If the dough is still cool and no butter is oozing out, you can give the dough another two turns now. If the condition of the dough is iffy, wrap it in plastic wrap and refrigerate it for at least 30 minutes. Each time you refrigerate the dough, mark the number of turns you've completed by indenting the dough with your fingertips. It is best to refrigerate the dough for 30 to 60 minutes between each set of two turns.

The total number of turns needed is six. If you prefer, you can give the dough just four turns now, chill it overnight, and do the last two turns the next day. Puff pastry is extremely flexible in this regard. However, no matter how you arrange your schedule, you should plan to chill the dough for at least an hour before cutting or shaping it.

For extra tips check Steph's post.

My thoughts on the challenge:
- Puff pastry is never easy and can be a bit daunting before you start. I'm glad things went almost according with the plan. I did have some issues with the butter but I blame the weather - very hot September.
- I've halved the recipe. My food processor's capacity wouldn't do with the original quantities! No problems to report. I still have some pastry for later, as I plan to use it to bake some Pastéis de nata (aka portuguese custard tarts).
- My vol au vents went savoury: red onion and rhubarb compote with soft goat's cheese. I was very pleased with the result. Thanks Steph, it was great fun and yummy!

Wonderful Vols au Vent can be found in The Daring Kitchen!

22.9.09

Lunchtime in New York City

One of the reasons why photography is so compelling is the human need to capture the moment. To lock and keep in order to call it "ours" hoping for the days and years to come not to take away the colours and the brightness. But photos won't keep smells, tastes or sounds - those we have to save in a special part of the memory, like some sort of essential reserve. Simone De Beauvoir used to say there's something in New York's air that makes sleep useless. It's, nevertheless, not the buzz or the lights of the city that never sleeps that I'll keep in the special airtight room of the memory but my last lunch in NY. Sitting outside on the terrace facing the Time Warner building with wonderful tree shades, just next to Central Park and Columbus Circle. Most memorable. Can't wait to come again.

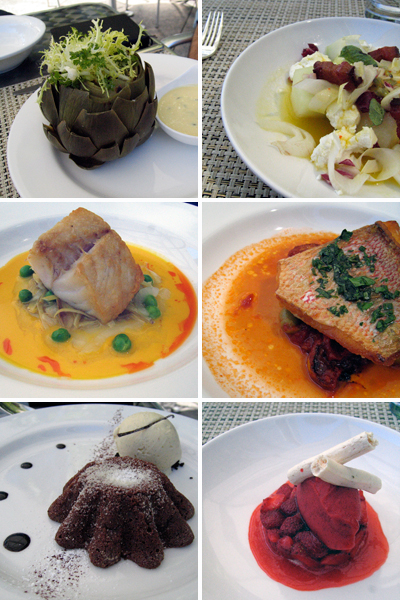
Nougatine at Jean Georges, NY

We left early in the morning. The day was sunny and the luggage was waiting for us at the hotel to be back home - it was our last day in NY. A visit to Cooper-Hewitt and a quick look at Guggenheim and there goes the morning. Nothing is ever quite in New York. Not even the mornings! So we ran through Central Park not knowing what was reserved for us at the table. Following a little bird's advice, we had lunch at Nougatine owned by Chef Jean-Georges (Obrigada, Constance!). The restaurant shares the same kitchen with Jean-Georges's formal dining room at Trump Plaza hotel. The fix price lunch (25$) was excellent and the service attentive without being pretentious or intrusive. I had a honeydew melon salad with clumps of goat cheese, bits of lardons, endive, and a drizzle of passion fruit dressing that was perfect, whilst Mr. Taster had a tasty artichoke with lemon mustard mayonnaise. We ordered fish: for me a red snapper with tomato confit and the husband, pink codfish with peas and carrot vinaigrette - both very good in terms of taste, quality, and presentation. For dessert, I picked the vanilla cake with strawberries and meringue (it was nice) and Mr.Taster decided for Jean-Georges' signature cake - warm chocolate and vanilla ice cream - that lead him to heaven. If there's a best chocolate cake in the whole world, this is it. Taster's word.

Nougatine at Jean Georges
1 Central Park West,
New York, NY 10023

14.9.09

[Sometimes] Your wish is my command.

Spicy Banana Muffins

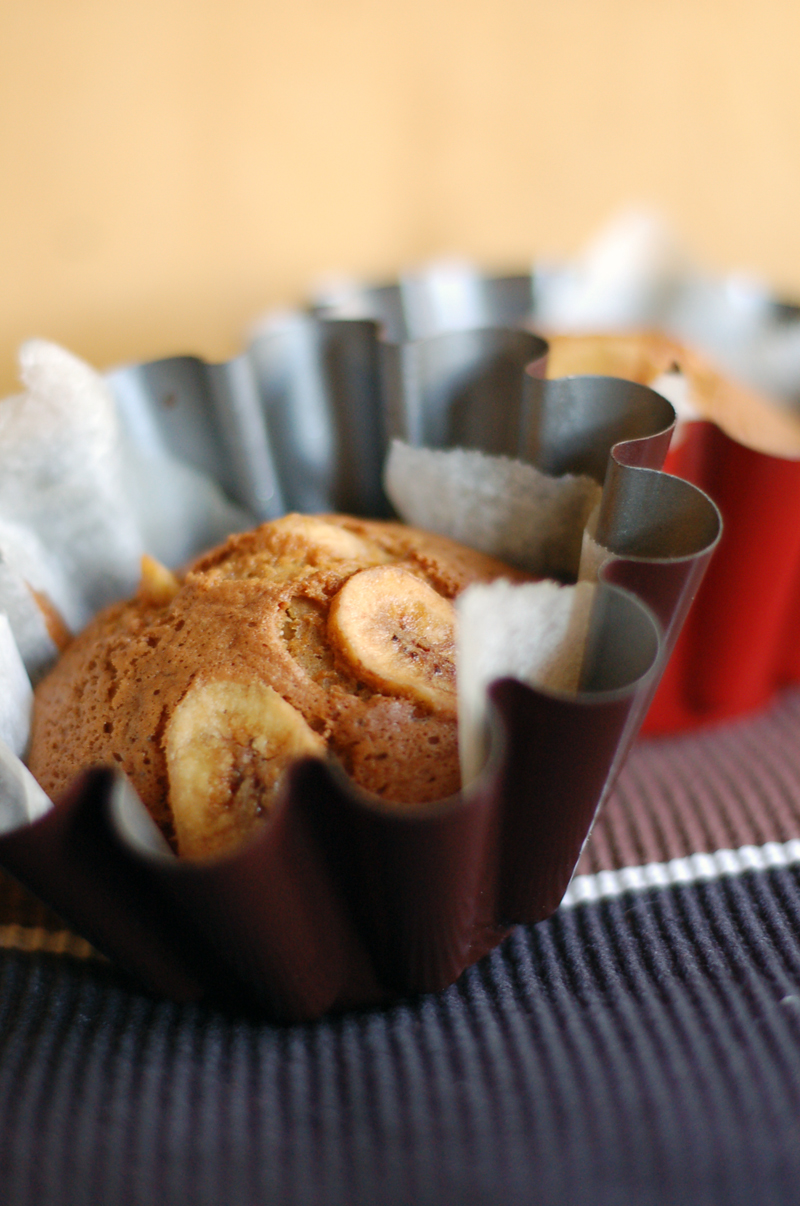
Lately, I’ve been up to my elbows in tomatoes. I received a big bunch of tomatoes when my parents visited and have been enjoying them everyday. But that's not what brings me here today (I'll tell what I've done with tomatoes later this week). Bananas. Many. Too many. Turning black and with freckles. Smelling of summer. What to do with a couple of very ripe bananas? Oh, you could bake some muffins, couldn't you? - the husband said. Your wish is my command! And so I did.

Spicy Banana Muffins

Makes 12

1 cup (150 grs) plain flour, sifted
⅓ cup muscovado sugar, packed
⅓ cup golden caster sugar
Dash of salt
¼ tsp baking soda
1 tsp baking powder
2 medium bananas, mashed
1/2 tsp ground cinnamon
1/2 tsp ground ginger
1/2 tsp ground nutmeg
⅓ cup (80 ml) walnut oil
½ tsp vanilla extract
2 large eggs
Dried banana chips (optional)

Preheat the oven to 180°C (350ºF). In a medium bowl, beat the mashed bananas with eggs, vanilla extract and walnut oil. Sift the flour, baking powder, baking soda and all spices into a second bowl. Add the sugars and mix. Combine both mixtures (liquid with dry ingredients). Beat just until combined. Pour the batter into silicone muffin pans (if using regular pans, line them first). Add some banana chips to each muffin. Bake for 25 minutes or until golden. Remove from the pan and cool on a wired rack.

8.9.09

10 food related things to love in NY

NY Skies

What can I write about New York that hasn't been written yet... Nothing, really. New York is huge and frenetic -- bigger and faster than any other place I've been before. Without precious advice from adorable dear friends, I would have been lost but thanks to them manage to get a little taste of the city. Many thanks guys, you saved our... stomachs!! ;-) 'Cause I really wouldn't want to bother you with the same old about NY, I've decided to enumerate 10 food related things to love about Madame Vertigo. I'm fully aware the sky is not eatable, at least not literally. New York skies just seemed the perfect way to start, and in between chewing the sky was the 11th thing on the list.

So here we go! 10 photos, 10 things, no special order.

10 (food related) things to love in NY

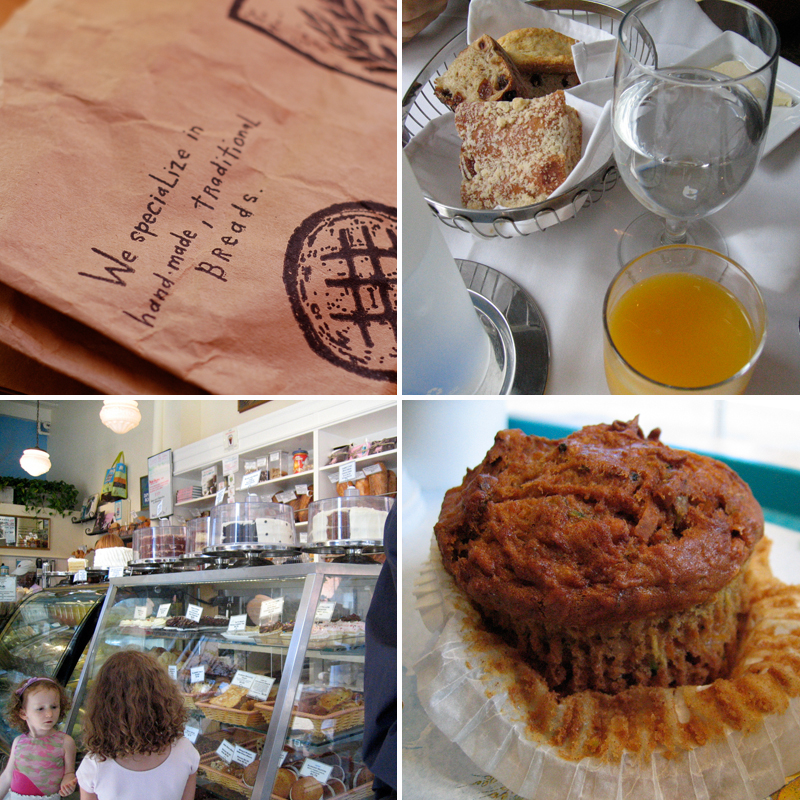
Bread - Whole Wheat, Sourdough, French bread. Organic. Just ask.

Tap water - Yes, no mistake. New York's tap water is something to cheer and love. Actually, it's something to drink to! Super.

Bakeries - I could live from bread alone. If a latte, a macchiato or a cappuccino can be added then I'm in heaven. And, of course, I won't say no to something on the sweet side. New York bakeries are awesome, and mind me I know a little about bakeries.

Muffins - I'm not the cupcake kind of girl, I'm more a muffin chick. Not that I can have a NY full-sized one by myself -- that's what makes Mr. Taster (aka The Husband) so handy, besides other things!! This is a Zucchini, Carrot, Walnut muffin. Perfect.

10 (food related) things to love in NY

Pancakes - Any pancake dish that comes with fruit is a winner. How to be in New York City, and not have a stack of fluffy buttermilk pancakes? No way.

French Toast - With blueberries. And maple syrup. I had mine with a Beet and Apple fresh juice I won't forget soon. Or the Illy espresso that came after. Yum.

10 (food related) things to love in NY

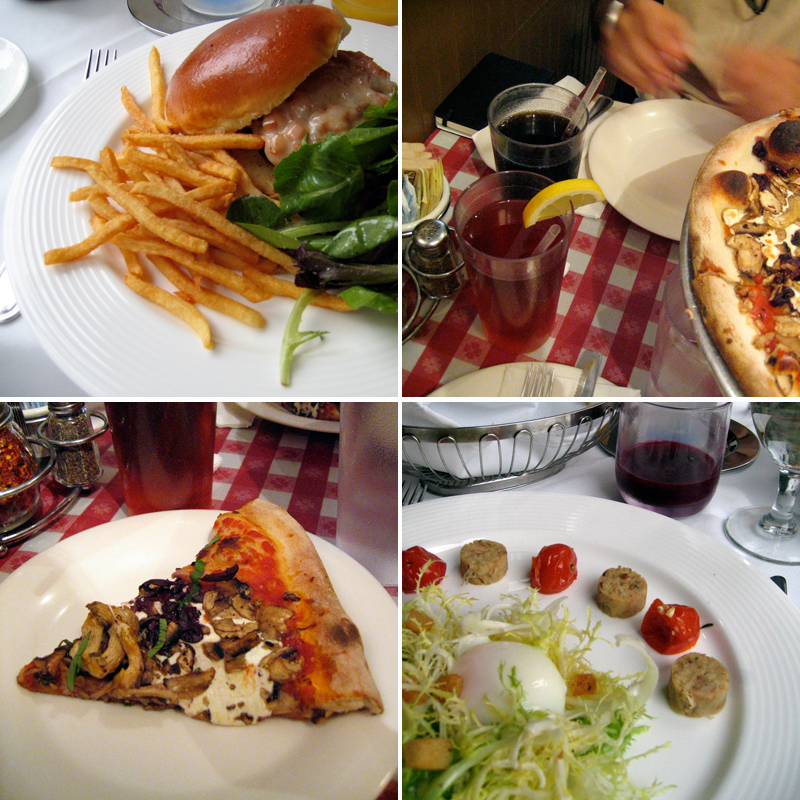
Burgers - OK, I didn't have this burger but Mr. Taster says it was pretty good. It's a burger with ratatouille and gruyere -- he actually recommends that if you're at L'École for brunch, you should try this.

Iced Tea - Not the sugary packed thing we have across Europe. Real tea 'on the rocks'. Very good.

Pizza - NY pizza. With fresh mushrooms and kalamata olives. Not disappointed.

Brunch - Breakfast was my favourite meal of the day. WAS. I'm about to change that to brunch.

Mr. Taster and I had a couple of wonderful meals, plus a gorgeous birthday lunch that I'll share later. Stay tuned.

27.7.09

DB#32 or Cookies!

Cookies

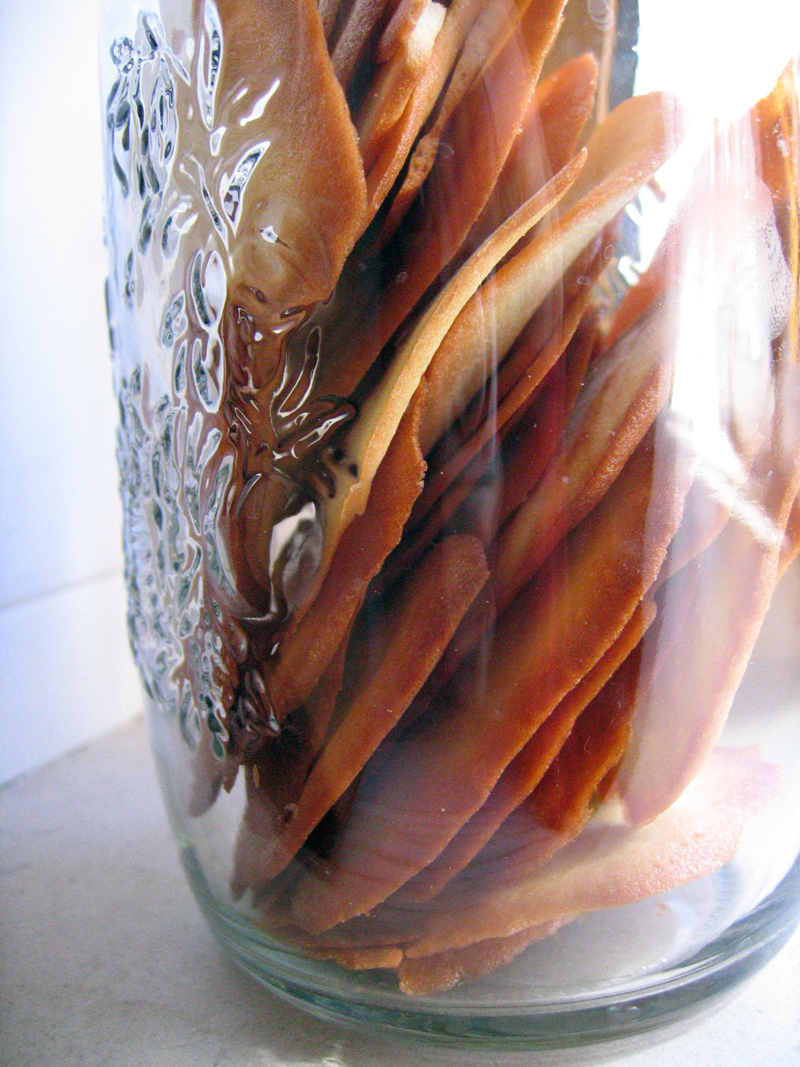
This is a post that almost didn't make it. Also, don't have the posting date fooling you. I'm terribly late for this month Daring Bakers' challenge... Even considered it to give it a ago because time really has been an issue lately, with days finishing too quickly for my taste (or needs!). BUT today's Wednesday, and I don't like to give up things on Wednesdays. Or any other day of the week, for that matter. Enough ramblings! I made Milan cookies. Or sort of. And I really want to share those with you.

The July Daring Bakers' challenge was hosted by Nicole at Sweet Tooth. She chose Chocolate Covered Marshmallow Cookies and Milan Cookies from pastry chef Gale Gand of the Food Network.

Cookies

Milan Cookies
Recipe courtesy Gale Gand, from Food Network website

Makes about 3 dozen cookies

• 12 tablespoons (170grams/ 6 oz) unsalted butter, softened
• 2 1/2 cups (312.5 grams/ 11.02 oz) powdered sugar
• 7/8 cup egg whites (from about 6 eggs)
• 2 tablespoons vanilla extract
• 2 tablespoons lemon extract
• 1 1/2 cups (187.5grams/ 6.61 oz) all purpose flour
• Cookie filling, recipe follows

Cookie filling:
• 1/2 cup heavy cream
• 8 ounces semisweet chocolate, chopped
• 1 orange, zested

1. In a mixer with paddle attachment cream the butter and the sugar.
2. Add the egg whites gradually and then mix in the vanilla and lemon extracts.
3. Add the flour and mix until just well mixed.
4. With a small (1/4-inch) plain tip, pipe 1-inch sections of batter onto a parchment-lined sheet pan, spacing them 2 inches apart as they spread.
5. Bake in a preheated 350 degree oven for 10 minutes or until light golden brown around the edges. Let cool on the pan.
6. While waiting for the cookies to cool, in a small saucepan over medium flame, scald cream.
7. Pour hot cream over chocolate in a bowl, whisk to melt chocolate, add zest and blend well.
8. Set aside to cool (the mixture will thicken as it cools).
9. Spread a thin amount of the filling onto the flat side of a cookie while the filling is still soft and press the flat side of a second cookie on top.
10. Repeat with the remainder of the cookies.

My thoughts on the challenge:
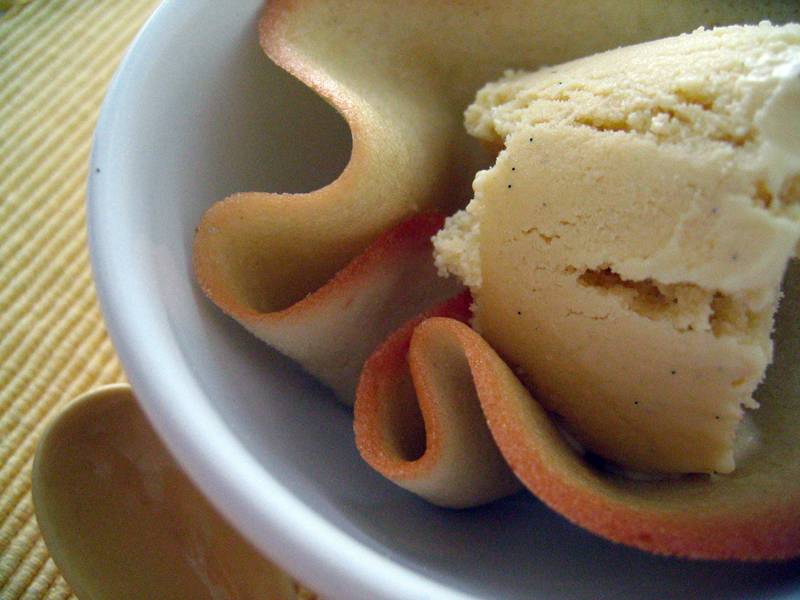
- It's too hot for melted chocolate around here at the moment. I served my cookies with Vanilla Ice Cream, the perfect vanilla ice cream recipe by David Lebovitz.
- Half recipe made about 20 large cookies. It worked fine.
- I haven't piped the batter, and used a spatula to spread the cookies. That's perhaps why mine got really thin and crisp.

27.6.09

DB#32 or Bakewell Tart... errr Pudding!

Bakewell Pudding

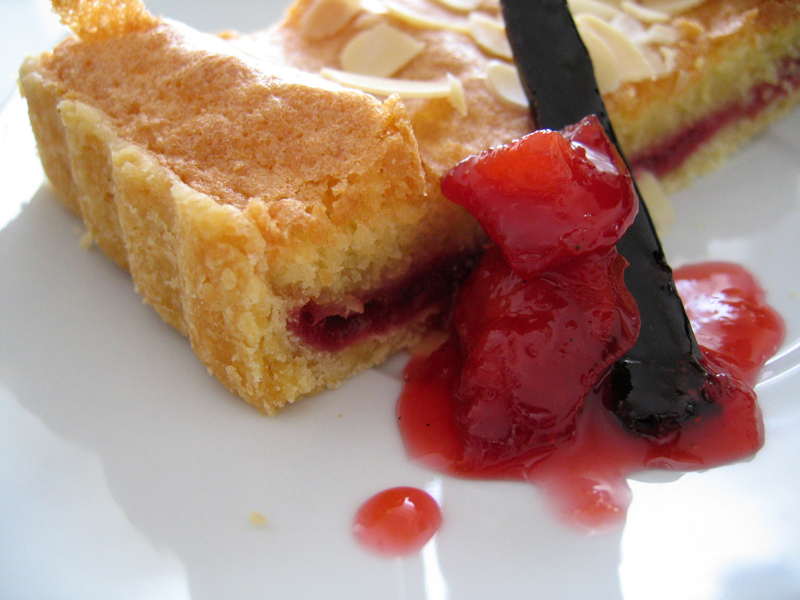
It's Saturday, and I haven't been home for a while, so today I'll keep it sweet and short: sweet because that's what a Bakewell Pudding is, and short because you don't need a large slice to feel that you've reached heaven. Yes, it's that good!

The June Daring Bakers' challenge was hosted by Jasmine of Confessions of a Cardamom Addict and Annemarie of Ambrosia and Nectar. They chose a Traditional (UK) Bakewell Tart... er... pudding that was inspired by a rich baking history dating back to the 1800's in England.

Bakewell Pudding

Bakewell Tart with Vanilla Plum Jam
Inspirations and References: Allan Davidson, Tamasin Day Lewis, Anton Edelmann, Jane Grigson, Nigella Lawson and Jamie Oliver

Sweet shortcrust pastry
Prep time: 15-20 minutes
Resting time: 30 minutes (minimum)
Equipment needed: bowls, box grater, cling film

225g (8oz) all purpose flour
30g (1oz) sugar
2.5ml (½ tsp) salt
110g (4oz) unsalted butter, cold (frozen is better)
2 (2) egg yolks
2.5ml (½ tsp) almond extract (optional)
15-30ml (1-2 Tbsp) cold water

Sift together flour, sugar and salt. Grate butter into the flour mixture, using the large hole-side of a box grater. Using your finger tips only, and working very quickly, rub the fat into the flour until the mixture resembles bread crumbs. Set aside.

Lightly beat the egg yolks with the almond extract (if using) and quickly mix into the flour mixture. Keep mixing while dribbling in the water, only adding enough to form a cohesive and slightly sticky dough.

Form the dough into a disc, wrap in cling and refrigerate for at least 30 minutes.

Frangipane
Prep time: 10-15 minutes
Equipment needed: bowls, hand mixer, rubber spatula

125g (4.5oz) unsalted butter, softened
125g (4.5oz) icing sugar
3 (3) eggs
2.5ml (½ tsp) almond extract
125g (4.5oz) ground almonds
30g (1oz) all purpose flour

Cream butter and sugar together for about a minute or until the mixture is primrose in colour and very fluffy. Scrape down the side of the bowl and add the eggs, one at a time, beating well after each addition. The batter may appear to curdle. In the words of Douglas Adams: Don’t panic. Really. It’ll be fine. After all three are in, pour in the almond extract and mix for about another 30 seconds and scrape down the sides again. With the beaters on, spoon in the ground nuts and the flour. Mix well. The mixture will be soft, keep its slightly curdled look (mostly from the almonds) and retain its pallid yellow colour.

~~~~~~~~~~~~~~~~~~

My vanilla plum jam
(Eat immediately / keep in the fridge)

750g red plums, cut into large chunks, peel on but stoned
125g granulated sugar
half a vanilla bean, seeds scraped + bean

Put the fruit and the sugar with the vanilla seeds and bean in a pan. Place the pan over a low to medium heat. Stir occasionally for 15-20 minutes, until syrupy. Remove from the heat, allow to slightly cool. (Wash and dry the bean to further use)

~~~~~~~~~~~~~~~~~~


Assembling the tart
Place the chilled dough disc on a lightly floured surface. If it's overly cold, you will need to let it become acclimatised for about 15 minutes before you roll it out. Flour the rolling pin and roll the pastry to 5mm (1/4”) thickness, by rolling in one direction only (start from the centre and roll away from you), and turning the disc a quarter turn after each roll. When the pastry is to the desired size and thickness, transfer it to the tart pan, press in and trim the excess dough. Patch any holes, fissures or tears with trimmed bits. Chill in the freezer for 15 minutes.

Preheat oven to 200ºC/400ºF.

Remove shell from freezer, spread as even a layer as you can of jam onto the pastry base. Top with frangipane, spreading to cover the entire surface of the tart. Smooth the top and pop into the oven for 30 minutes. Five minutes before the tart is done, the top will be poofy and brownish. Remove from oven and strew flaked almonds on top and return to the heat for the last five minutes of baking.

The finished tart will have a golden crust and the frangipane will be tanned, poofy and a bit spongy-looking. Remove from the oven and cool on the counter. Serve warm, with crème fraîche, whipped cream or custard sauce if you wish.

When you slice into the tart, the almond paste will be firm, but slightly squidgy and the crust should be crisp but not tough.

My thoughts on the challenge:
~ I've kept my eye on this Bakewell tart for a while, and I'm really glad Jasmine and Annemarie chose this for June's challenge.
~ My idea for the jam had to do with the fruit I had and the reddish layer I had in mind to cheer up the crust and the frangipane. The recipe for the jam is my usual one with little sugar but it won't keep for a long time.
~ As usual, I've used half the crust and 2/3 of the frangipane - yes, I'm that complicated!
~ No problem with any of the components - all done without any mess.
~ I'll definitely be doing this again with other fruit jams.