27.9.09

Daring Bakers - Gone with the wind!

Vol au Vent

Vol au Vent means literally 'windblown'. These little treats are so light and crisp you could almost make them fly with a whisper. And if you're using homemade puff pastry you're sure to have whispered a lot whilst making it, not to mention a little cursing! At least I did. September has been HOT in Lisbon. I'm not complaining about this - well, I actually am... It's not the weather itself but the weather when dealing with a block of butter that's suppose to be soft enough to flow freely and cold enough to layer properly. Meaning I had like 2 minutes to work my way with the turns. In the end, although my kitchen was a bit of a mess, the pastry was nice and the all process went smoother than expected.

The September 2009 Daring Bakers' challenge was hosted by Steph of A Whisk and a Spoon. She chose the French treat, Vols-au-Vent based on the Puff Pastry recipe by Michel Richard from the cookbook Baking With Julia by Dorie Greenspan.
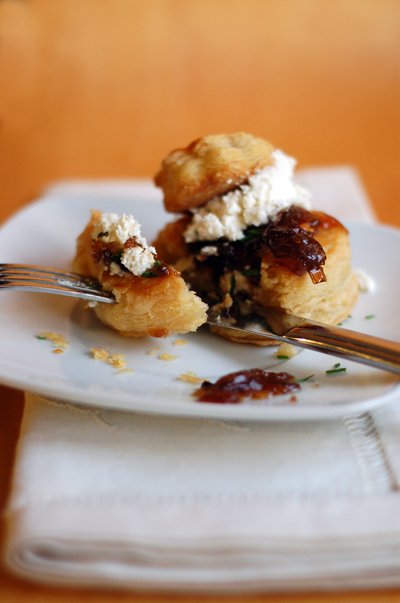
Vol au Vent

Vols au Vent

You will need:
-well-chilled puff pastry dough (recipe below)
-egg wash (1 egg or yolk beaten with a small amount of water)
-your filling of choice

Line a baking sheet with parchment and set aside.

Using a knife or metal bench scraper, divided your chilled puff pastry dough into three equal pieces. Work with one piece of the dough, and leave the rest wrapped and chilled. (If you are looking to make more vols-au-vent than the yield stated above, you can roll and cut the remaining two pieces of dough as well…if not, then leave refrigerated for the time being or prepare it for longer-term freezer storage. See the “Tips” section below for more storage info.)

On a lightly floured surface, roll the piece of dough into a rectangle about 1/8 to 1/4-inch (3-6 mm) thick. Transfer it to the baking sheet and refrigerate for about 10 minutes before proceeding with the cutting.

Using a ¾-inch cutter for small vols-au-vent, or a 2- to 2.5-inch round cutter for large, cut centers from half of the rounds to make rings. These rings will become the sides of the vols-au-vent, while the solid disks will be the bottoms. You can either save the center cut-outs to bake off as little “caps” for you vols-au-vent, or put them in the scrap pile.

Dock the solid bottom rounds with a fork (prick them lightly, making sure not to go all the way through the pastry) and lightly brush them with egg wash. Place the rings directly on top of the bottom rounds and very lightly press them to adhere. Brush the top rings lightly with egg wash, trying not to drip any down the sides (which may inhibit rise). If you are using the little “caps,” dock and egg wash them as well.

Refrigerate the assembled vols-au-vent on the lined baking sheet while you pre-heat the oven to 400ºF (200ºC). (You could also cover and refrigerate them for a few hours at this point.)

Once the oven is heated, remove the sheet from the refrigerator and place a silicon baking mat (preferred because of its weight) or another sheet of parchment over top of the shells. This will help them rise evenly. Bake the shells until they have risen and begin to brown, about 10-15 minutes depending on their size. Reduce the oven temperature to 350ºF (180ºC), and remove the silicon mat or parchment sheet from the top of the vols-au-vent. If the centers have risen up inside the vols-au-vent, you can gently press them down. Continue baking (with no sheet on top) until the layers are golden, about 15-20 minutes more. (If you are baking the center “caps” they will likely be finished well ahead of the shells, so keep an eye on them and remove them from the oven when browned.)

Remove to a rack to cool. Cool to room temperature for cold fillings or to warm for hot fillings.

Fill and serve.

*For additional rise on the larger-sized vols-au-vents, you can stack one or two additional ring layers on top of each other (using egg wash to "glue"). This will give higher sides to larger vols-au-vents, but is not advisable for the smaller ones, whose bases may not be large enough to support the extra weight.

*Although they are at their best filled and eaten soon after baking, baked vols-au-vent shells can be stored airtight for a day.

*Shaped, unbaked vols-au-vent can be wrapped and frozen for up to a month (bake from frozen, egg-washing them first).

Michel Richard’s Puff Pastry Dough

Baking with Julia by Dorie Greenspan
Yield: 2-1/2 pounds dough

Ingredients:
2-1/2 cups (12.2 oz/ 354 g) unbleached all-purpose flour
1-1/4 cups (5.0 oz/ 142 g) cake flour
1 tbsp. salt (you can cut this by half for a less salty dough or for sweet preparations)
1-1/4 cups (10 fl oz/ 300 ml) ice water
1 pound (16 oz/ 454 g) very cold unsalted butter

plus extra flour for dusting work surface

Mixing the Dough:

Check the capacity of your food processor before you start. If it cannot hold the full quantity of ingredients, make the dough into two batches and combine them.

Put the all-purpose flour, cake flour, and salt in the work bowl of a food processor fitted with a metal blade and pulse a couple of times just to mix. Add the water all at once, pulsing until the dough forms a ball on the blade. The dough will be very moist and pliable and will hold together when squeezed between your fingers. (Actually, it will feel like Play-Doh.)

Remove the dough from the machine, form it into a ball, with a small sharp knife, slash the top in a tic-tac-toe pattern. Wrap the dough in a damp towel and refrigerate for about 5 minutes.

Meanwhile, place the butter between 2 sheets of plastic wrap and beat it with a rolling pin until it flattens into a square that's about 1" thick. Take care that the butter remains cool and firm: if it has softened or become oily, chill it before continuing.

Incorporating the Butter:

Unwrap the dough and place it on a work surface dusted with all-purpose flour (A cool piece of marble is the ideal surface for puff pastry) with your rolling pin (preferably a French rolling pin without handles), press on the dough to flatten it and then roll it into a 10" square. Keep the top and bottom of the dough well floured to prevent sticking and lift the dough and move it around frequently. Starting from the center of the square, roll out over each corner to create a thick center pad with "ears," or flaps.

Place the cold butter in the middle of the dough and fold the ears over the butter, stretching them as needed so that they overlap slightly and encase the butter completely. (If you have to stretch the dough, stretch it from all over; don't just pull the ends) you should now have a package that is 8" square.

To make great puff pastry, it is important to keep the dough cold at all times. There are specified times for chilling the dough, but if your room is warm, or you work slowly, or you find that for no particular reason the butter starts to ooze out of the pastry, cover the dough with plastic wrap and refrigerate it . You can stop at any point in the process and continue at your convenience or when the dough is properly chilled.

Making the Turns:

Gently but firmly press the rolling pin against the top and bottom edges of the square (this will help keep it square). Then, keeping the work surface and the top of the dough well floured to prevent sticking, roll the dough into a rectangle that is three times as long as the square you started with, about 24" (don't worry about the width of the rectangle: if you get the 24", everything else will work itself out.) With this first roll, it is particularly important that the butter be rolled evenly along the length and width of the rectangle; check when you start rolling that the butter is moving along well, and roll a bit harder or more evenly, if necessary, to get a smooth, even dough-butter sandwich (use your arm-strength!).

With a pastry brush, brush off the excess flour from the top of the dough, and fold the rectangle up from the bottom and down from the top in thirds, like a business letter, brushing off the excess flour. You have completed one turn.

Rotate the dough so that the closed fold is to your left, like the spine of a book. Repeat the rolling and folding process, rolling the dough to a length of 24" and then folding it in thirds. This is the second turn.

Chilling the Dough:

If the dough is still cool and no butter is oozing out, you can give the dough another two turns now. If the condition of the dough is iffy, wrap it in plastic wrap and refrigerate it for at least 30 minutes. Each time you refrigerate the dough, mark the number of turns you've completed by indenting the dough with your fingertips. It is best to refrigerate the dough for 30 to 60 minutes between each set of two turns.

The total number of turns needed is six. If you prefer, you can give the dough just four turns now, chill it overnight, and do the last two turns the next day. Puff pastry is extremely flexible in this regard. However, no matter how you arrange your schedule, you should plan to chill the dough for at least an hour before cutting or shaping it.

For extra tips check Steph's post.

My thoughts on the challenge:
- Puff pastry is never easy and can be a bit daunting before you start. I'm glad things went almost according with the plan. I did have some issues with the butter but I blame the weather - very hot September.
- I've halved the recipe. My food processor's capacity wouldn't do with the original quantities! No problems to report. I still have some pastry for later, as I plan to use it to bake some Pastéis de nata (aka portuguese custard tarts).
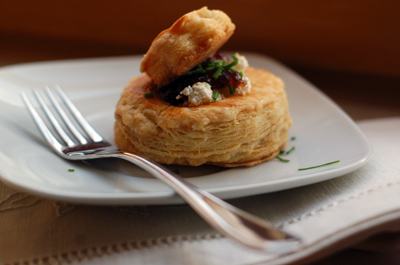
- My vol au vents went savoury: red onion and rhubarb compote with soft goat's cheese. I was very pleased with the result. Thanks Steph, it was great fun and yummy!

Wonderful Vols au Vent can be found in The Daring Kitchen!

22.9.09

Lunchtime in New York City

One of the reasons why photography is so compelling is the human need to capture the moment. To lock and keep in order to call it "ours" hoping for the days and years to come not to take away the colours and the brightness. But photos won't keep smells, tastes or sounds - those we have to save in a special part of the memory, like some sort of essential reserve. Simone De Beauvoir used to say there's something in New York's air that makes sleep useless. It's, nevertheless, not the buzz or the lights of the city that never sleeps that I'll keep in the special airtight room of the memory but my last lunch in NY. Sitting outside on the terrace facing the Time Warner building with wonderful tree shades, just next to Central Park and Columbus Circle. Most memorable. Can't wait to come again.

Nougatine at Jean Georges, NY

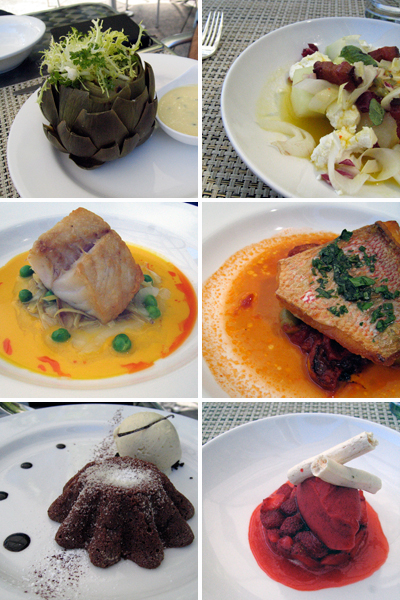
We left early in the morning. The day was sunny and the luggage was waiting for us at the hotel to be back home - it was our last day in NY. A visit to Cooper-Hewitt and a quick look at Guggenheim and there goes the morning. Nothing is ever quite in New York. Not even the mornings! So we ran through Central Park not knowing what was reserved for us at the table. Following a little bird's advice, we had lunch at Nougatine owned by Chef Jean-Georges (Obrigada, Constance!). The restaurant shares the same kitchen with Jean-Georges's formal dining room at Trump Plaza hotel. The fix price lunch (25$) was excellent and the service attentive without being pretentious or intrusive. I had a honeydew melon salad with clumps of goat cheese, bits of lardons, endive, and a drizzle of passion fruit dressing that was perfect, whilst Mr. Taster had a tasty artichoke with lemon mustard mayonnaise. We ordered fish: for me a red snapper with tomato confit and the husband, pink codfish with peas and carrot vinaigrette - both very good in terms of taste, quality, and presentation. For dessert, I picked the vanilla cake with strawberries and meringue (it was nice) and Mr.Taster decided for Jean-Georges' signature cake - warm chocolate and vanilla ice cream - that lead him to heaven. If there's a best chocolate cake in the whole world, this is it. Taster's word.

Nougatine at Jean Georges
1 Central Park West,
New York, NY 10023

14.9.09

[Sometimes] Your wish is my command.

Spicy Banana Muffins

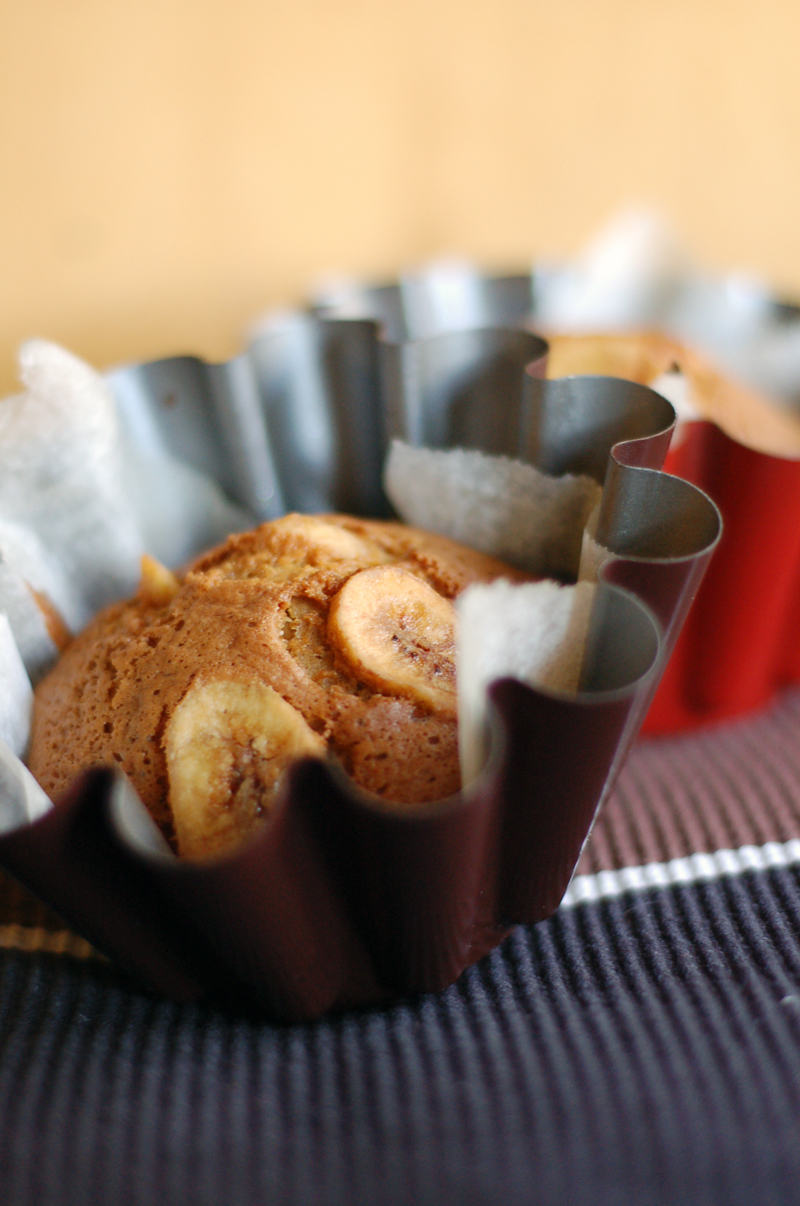
Lately, I’ve been up to my elbows in tomatoes. I received a big bunch of tomatoes when my parents visited and have been enjoying them everyday. But that's not what brings me here today (I'll tell what I've done with tomatoes later this week). Bananas. Many. Too many. Turning black and with freckles. Smelling of summer. What to do with a couple of very ripe bananas? Oh, you could bake some muffins, couldn't you? - the husband said. Your wish is my command! And so I did.

Spicy Banana Muffins

Makes 12

1 cup (150 grs) plain flour, sifted
⅓ cup muscovado sugar, packed
⅓ cup golden caster sugar
Dash of salt
¼ tsp baking soda
1 tsp baking powder
2 medium bananas, mashed
1/2 tsp ground cinnamon
1/2 tsp ground ginger
1/2 tsp ground nutmeg
⅓ cup (80 ml) walnut oil
½ tsp vanilla extract
2 large eggs
Dried banana chips (optional)

Preheat the oven to 180°C (350ºF). In a medium bowl, beat the mashed bananas with eggs, vanilla extract and walnut oil. Sift the flour, baking powder, baking soda and all spices into a second bowl. Add the sugars and mix. Combine both mixtures (liquid with dry ingredients). Beat just until combined. Pour the batter into silicone muffin pans (if using regular pans, line them first). Add some banana chips to each muffin. Bake for 25 minutes or until golden. Remove from the pan and cool on a wired rack.

8.9.09

10 food related things to love in NY

NY Skies

What can I write about New York that hasn't been written yet... Nothing, really. New York is huge and frenetic -- bigger and faster than any other place I've been before. Without precious advice from adorable dear friends, I would have been lost but thanks to them manage to get a little taste of the city. Many thanks guys, you saved our... stomachs!! ;-) 'Cause I really wouldn't want to bother you with the same old about NY, I've decided to enumerate 10 food related things to love about Madame Vertigo. I'm fully aware the sky is not eatable, at least not literally. New York skies just seemed the perfect way to start, and in between chewing the sky was the 11th thing on the list.

So here we go! 10 photos, 10 things, no special order.

10 (food related) things to love in NY

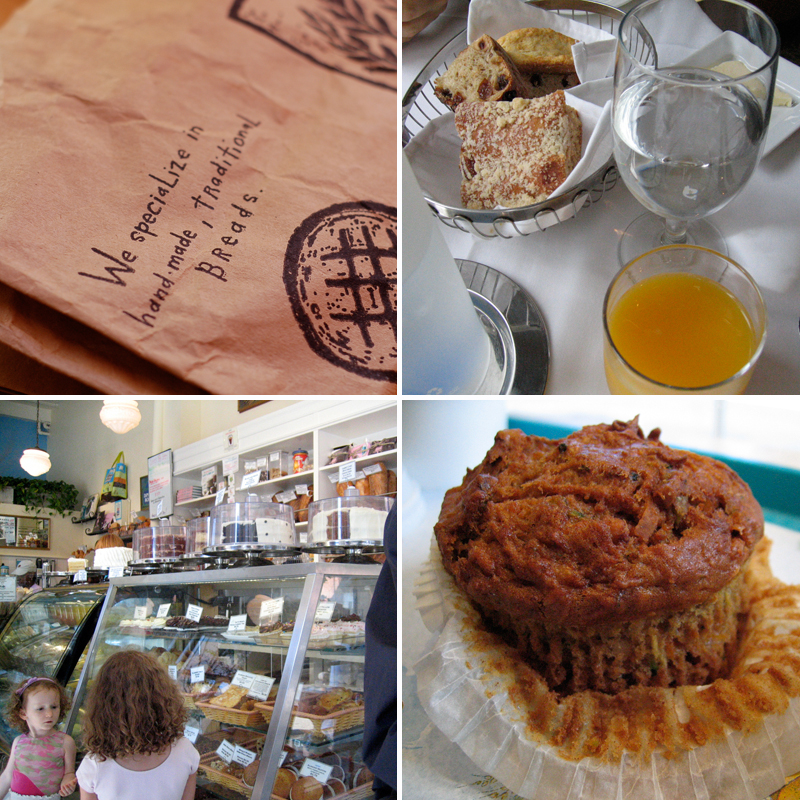
Bread - Whole Wheat, Sourdough, French bread. Organic. Just ask.

Tap water - Yes, no mistake. New York's tap water is something to cheer and love. Actually, it's something to drink to! Super.

Bakeries - I could live from bread alone. If a latte, a macchiato or a cappuccino can be added then I'm in heaven. And, of course, I won't say no to something on the sweet side. New York bakeries are awesome, and mind me I know a little about bakeries.

Muffins - I'm not the cupcake kind of girl, I'm more a muffin chick. Not that I can have a NY full-sized one by myself -- that's what makes Mr. Taster (aka The Husband) so handy, besides other things!! This is a Zucchini, Carrot, Walnut muffin. Perfect.

10 (food related) things to love in NY

Pancakes - Any pancake dish that comes with fruit is a winner. How to be in New York City, and not have a stack of fluffy buttermilk pancakes? No way.

French Toast - With blueberries. And maple syrup. I had mine with a Beet and Apple fresh juice I won't forget soon. Or the Illy espresso that came after. Yum.

10 (food related) things to love in NY

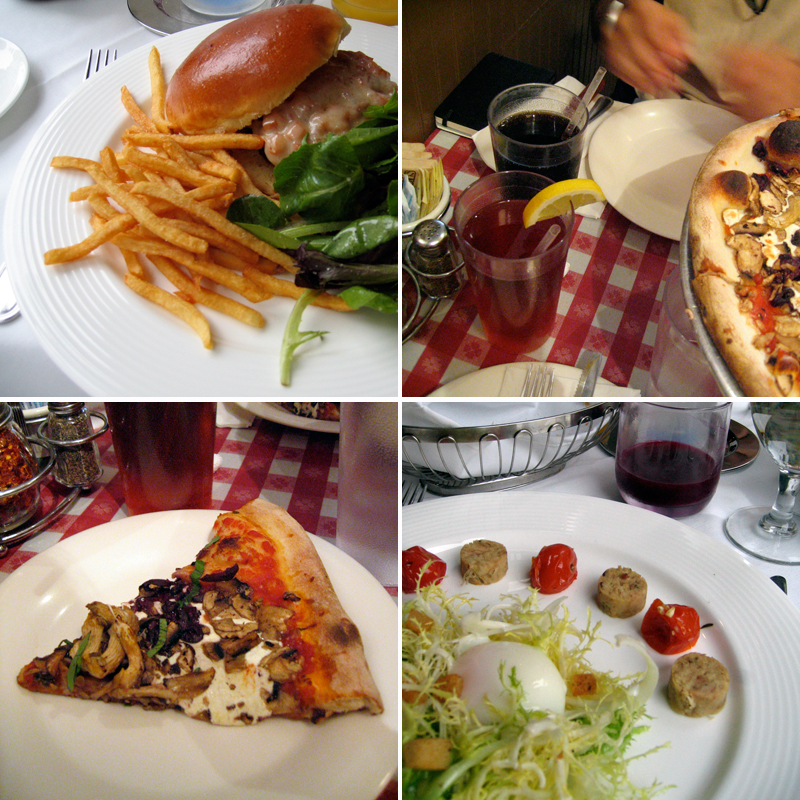
Burgers - OK, I didn't have this burger but Mr. Taster says it was pretty good. It's a burger with ratatouille and gruyere -- he actually recommends that if you're at L'École for brunch, you should try this.

Iced Tea - Not the sugary packed thing we have across Europe. Real tea 'on the rocks'. Very good.

Pizza - NY pizza. With fresh mushrooms and kalamata olives. Not disappointed.

Brunch - Breakfast was my favourite meal of the day. WAS. I'm about to change that to brunch.

Mr. Taster and I had a couple of wonderful meals, plus a gorgeous birthday lunch that I'll share later. Stay tuned.

27.7.09

DB#32 or Cookies!

Cookies

This is a post that almost didn't make it. Also, don't have the posting date fooling you. I'm terribly late for this month Daring Bakers' challenge... Even considered it to give it a ago because time really has been an issue lately, with days finishing too quickly for my taste (or needs!). BUT today's Wednesday, and I don't like to give up things on Wednesdays. Or any other day of the week, for that matter. Enough ramblings! I made Milan cookies. Or sort of. And I really want to share those with you.

The July Daring Bakers' challenge was hosted by Nicole at Sweet Tooth. She chose Chocolate Covered Marshmallow Cookies and Milan Cookies from pastry chef Gale Gand of the Food Network.

Cookies

Milan Cookies
Recipe courtesy Gale Gand, from Food Network website

Makes about 3 dozen cookies

• 12 tablespoons (170grams/ 6 oz) unsalted butter, softened
• 2 1/2 cups (312.5 grams/ 11.02 oz) powdered sugar
• 7/8 cup egg whites (from about 6 eggs)
• 2 tablespoons vanilla extract
• 2 tablespoons lemon extract
• 1 1/2 cups (187.5grams/ 6.61 oz) all purpose flour
• Cookie filling, recipe follows

Cookie filling:
• 1/2 cup heavy cream
• 8 ounces semisweet chocolate, chopped
• 1 orange, zested

1. In a mixer with paddle attachment cream the butter and the sugar.
2. Add the egg whites gradually and then mix in the vanilla and lemon extracts.
3. Add the flour and mix until just well mixed.
4. With a small (1/4-inch) plain tip, pipe 1-inch sections of batter onto a parchment-lined sheet pan, spacing them 2 inches apart as they spread.
5. Bake in a preheated 350 degree oven for 10 minutes or until light golden brown around the edges. Let cool on the pan.
6. While waiting for the cookies to cool, in a small saucepan over medium flame, scald cream.
7. Pour hot cream over chocolate in a bowl, whisk to melt chocolate, add zest and blend well.
8. Set aside to cool (the mixture will thicken as it cools).
9. Spread a thin amount of the filling onto the flat side of a cookie while the filling is still soft and press the flat side of a second cookie on top.
10. Repeat with the remainder of the cookies.

My thoughts on the challenge:
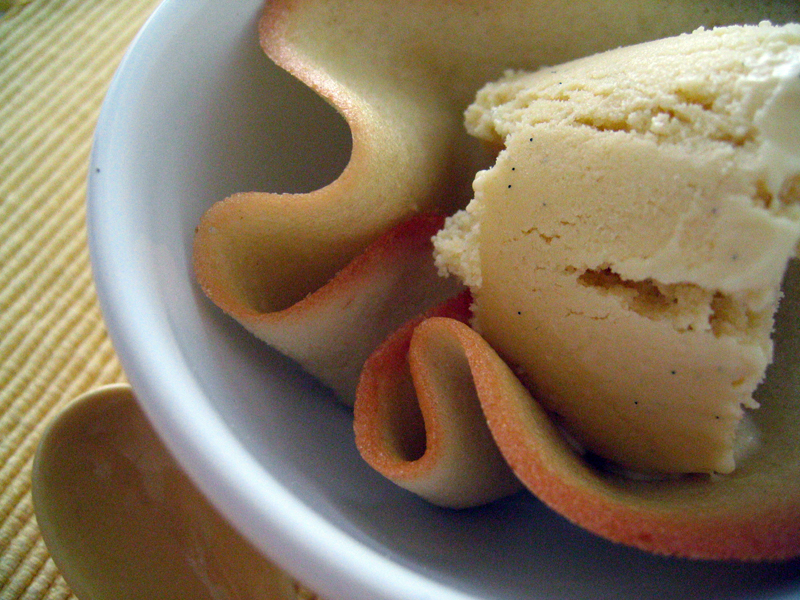
- It's too hot for melted chocolate around here at the moment. I served my cookies with Vanilla Ice Cream, the perfect vanilla ice cream recipe by David Lebovitz.
- Half recipe made about 20 large cookies. It worked fine.
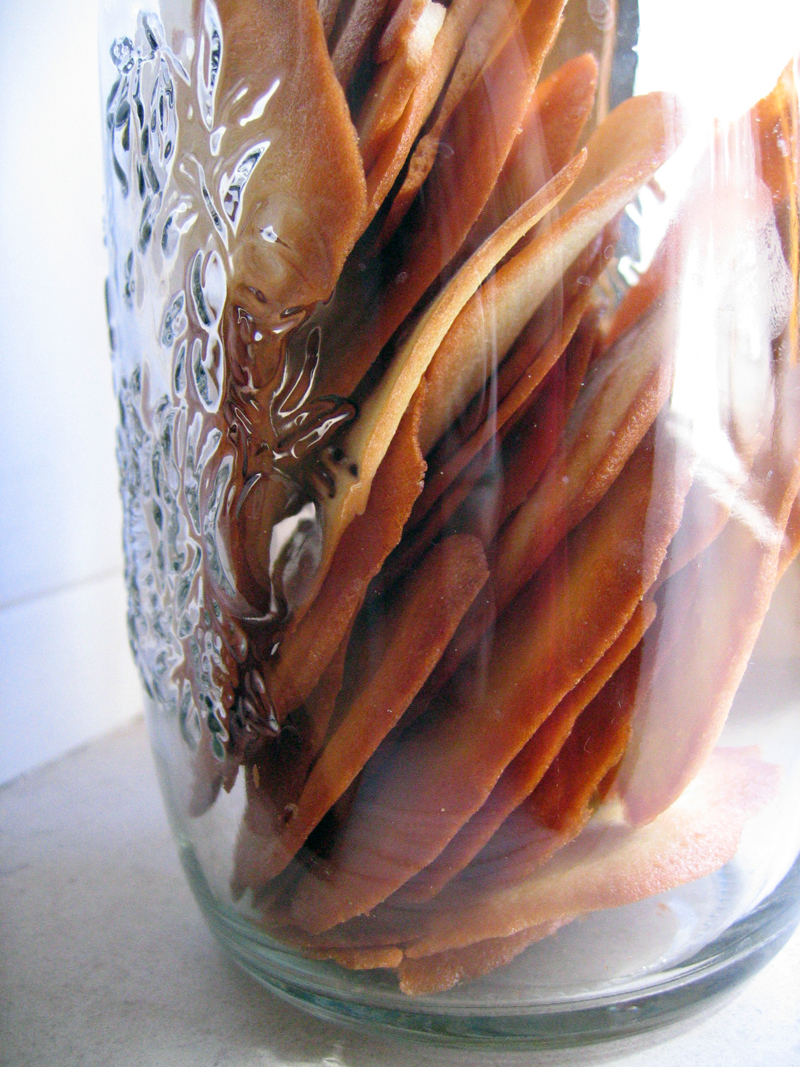
- I haven't piped the batter, and used a spatula to spread the cookies. That's perhaps why mine got really thin and crisp.

27.6.09

DB#32 or Bakewell Tart... errr Pudding!

Bakewell Pudding

It's Saturday, and I haven't been home for a while, so today I'll keep it sweet and short: sweet because that's what a Bakewell Pudding is, and short because you don't need a large slice to feel that you've reached heaven. Yes, it's that good!

The June Daring Bakers' challenge was hosted by Jasmine of Confessions of a Cardamom Addict and Annemarie of Ambrosia and Nectar. They chose a Traditional (UK) Bakewell Tart... er... pudding that was inspired by a rich baking history dating back to the 1800's in England.

Bakewell Pudding

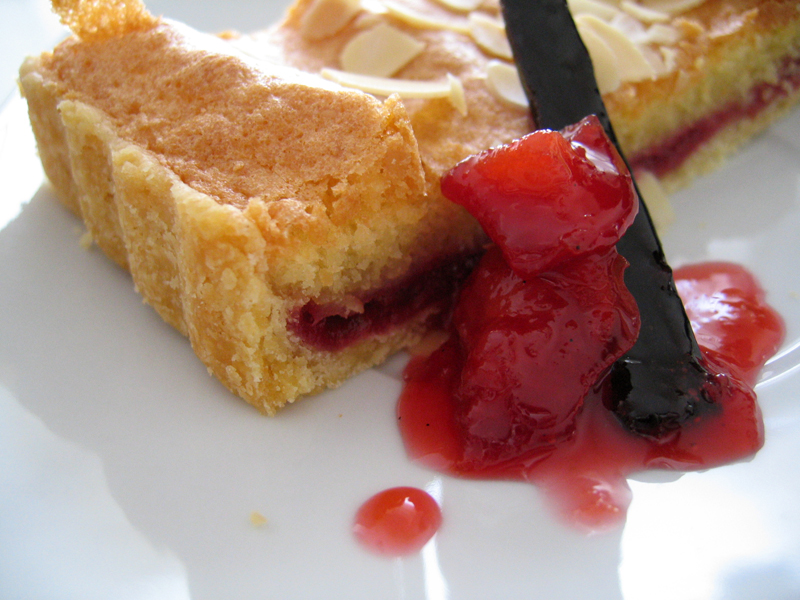
Bakewell Tart with Vanilla Plum Jam
Inspirations and References: Allan Davidson, Tamasin Day Lewis, Anton Edelmann, Jane Grigson, Nigella Lawson and Jamie Oliver

Sweet shortcrust pastry
Prep time: 15-20 minutes
Resting time: 30 minutes (minimum)
Equipment needed: bowls, box grater, cling film

225g (8oz) all purpose flour
30g (1oz) sugar
2.5ml (½ tsp) salt
110g (4oz) unsalted butter, cold (frozen is better)
2 (2) egg yolks
2.5ml (½ tsp) almond extract (optional)
15-30ml (1-2 Tbsp) cold water

Sift together flour, sugar and salt. Grate butter into the flour mixture, using the large hole-side of a box grater. Using your finger tips only, and working very quickly, rub the fat into the flour until the mixture resembles bread crumbs. Set aside.

Lightly beat the egg yolks with the almond extract (if using) and quickly mix into the flour mixture. Keep mixing while dribbling in the water, only adding enough to form a cohesive and slightly sticky dough.

Form the dough into a disc, wrap in cling and refrigerate for at least 30 minutes.

Frangipane
Prep time: 10-15 minutes
Equipment needed: bowls, hand mixer, rubber spatula

125g (4.5oz) unsalted butter, softened
125g (4.5oz) icing sugar
3 (3) eggs
2.5ml (½ tsp) almond extract
125g (4.5oz) ground almonds
30g (1oz) all purpose flour

Cream butter and sugar together for about a minute or until the mixture is primrose in colour and very fluffy. Scrape down the side of the bowl and add the eggs, one at a time, beating well after each addition. The batter may appear to curdle. In the words of Douglas Adams: Don’t panic. Really. It’ll be fine. After all three are in, pour in the almond extract and mix for about another 30 seconds and scrape down the sides again. With the beaters on, spoon in the ground nuts and the flour. Mix well. The mixture will be soft, keep its slightly curdled look (mostly from the almonds) and retain its pallid yellow colour.

~~~~~~~~~~~~~~~~~~

My vanilla plum jam
(Eat immediately / keep in the fridge)

750g red plums, cut into large chunks, peel on but stoned
125g granulated sugar
half a vanilla bean, seeds scraped + bean

Put the fruit and the sugar with the vanilla seeds and bean in a pan. Place the pan over a low to medium heat. Stir occasionally for 15-20 minutes, until syrupy. Remove from the heat, allow to slightly cool. (Wash and dry the bean to further use)

~~~~~~~~~~~~~~~~~~


Assembling the tart
Place the chilled dough disc on a lightly floured surface. If it's overly cold, you will need to let it become acclimatised for about 15 minutes before you roll it out. Flour the rolling pin and roll the pastry to 5mm (1/4”) thickness, by rolling in one direction only (start from the centre and roll away from you), and turning the disc a quarter turn after each roll. When the pastry is to the desired size and thickness, transfer it to the tart pan, press in and trim the excess dough. Patch any holes, fissures or tears with trimmed bits. Chill in the freezer for 15 minutes.

Preheat oven to 200ºC/400ºF.

Remove shell from freezer, spread as even a layer as you can of jam onto the pastry base. Top with frangipane, spreading to cover the entire surface of the tart. Smooth the top and pop into the oven for 30 minutes. Five minutes before the tart is done, the top will be poofy and brownish. Remove from oven and strew flaked almonds on top and return to the heat for the last five minutes of baking.

The finished tart will have a golden crust and the frangipane will be tanned, poofy and a bit spongy-looking. Remove from the oven and cool on the counter. Serve warm, with crème fraîche, whipped cream or custard sauce if you wish.

When you slice into the tart, the almond paste will be firm, but slightly squidgy and the crust should be crisp but not tough.

My thoughts on the challenge:
~ I've kept my eye on this Bakewell tart for a while, and I'm really glad Jasmine and Annemarie chose this for June's challenge.
~ My idea for the jam had to do with the fruit I had and the reddish layer I had in mind to cheer up the crust and the frangipane. The recipe for the jam is my usual one with little sugar but it won't keep for a long time.
~ As usual, I've used half the crust and 2/3 of the frangipane - yes, I'm that complicated!
~ No problem with any of the components - all done without any mess.
~ I'll definitely be doing this again with other fruit jams.

15.6.09

French inspiration

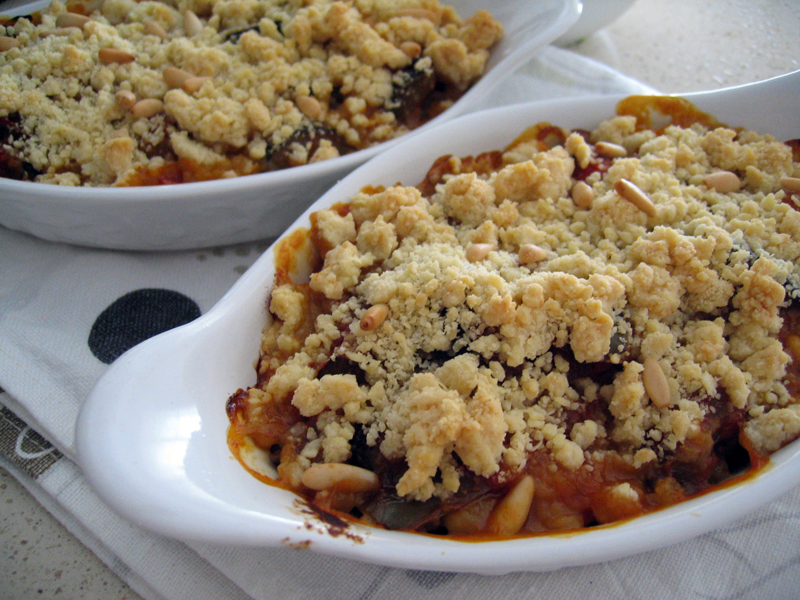
Crumble à la Ratatouille

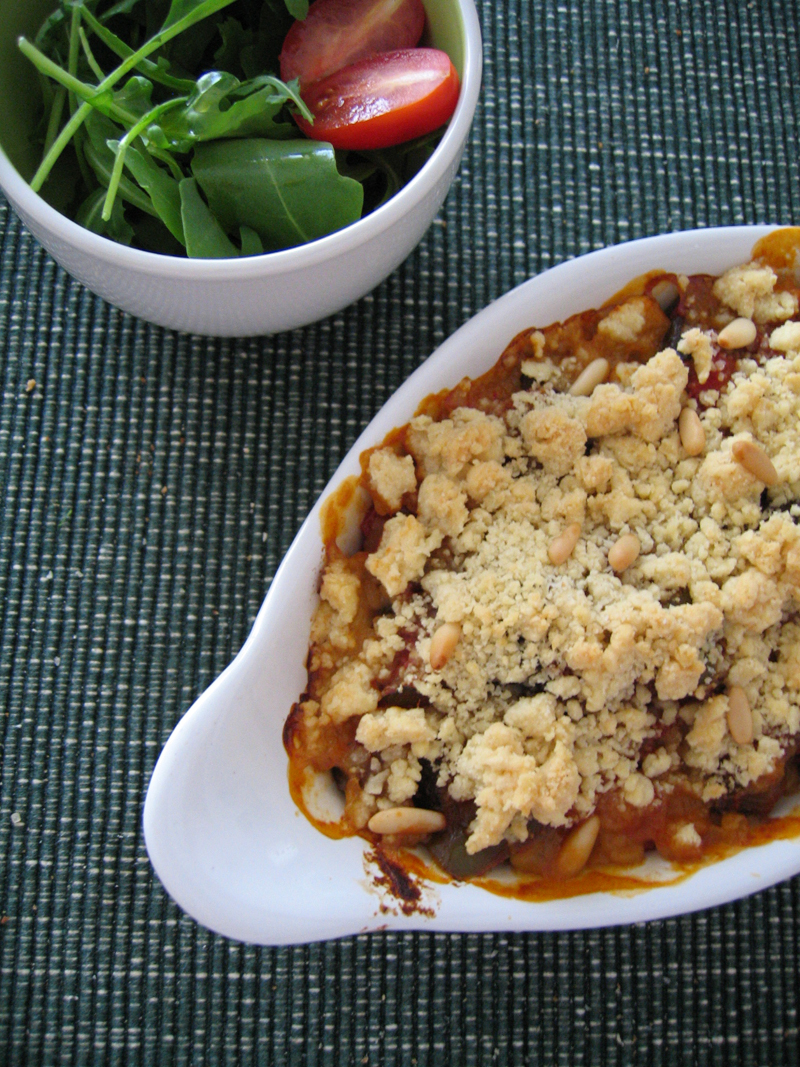
Sorry for my absence. I still have a post about Slovenia to write, and a few recipes to share, plus a few complains about the weather and my usual nonsense. But once again it won't be today. It's time for another short trip to Paris - I'll be joining a conference this week but didn't want to leave you all without a little something to evoke la cuisine française. My (british) friend N. always says that "if you want a perfect queue ask a briton, if you're craving for an awesome crumble trust a frenchie!" And from my experience N. is absolutely right! This Crumble à la Ratatouille is a nice version of a French classic dish in a traditional British fashion. All I can say is that everybody loved it, and I'll be making this again. À bientôt

Crumble à la Ratatouille

Crumble à la ratatouille
Adapted from Trish Deseine, recipe here

4 tablespoons olive oil
1 onion, finely chopped
2 garlic cloves, crushed
1 aubergine, cubed
1 red pepper, cut into strips
1 green pepper, cut into strips
3 courgettes, peeled if you like and cut into chunks
1 kg tomatoes, skinned and deseeded
Fresh thyme and rosemary

For the Crumble Topping
100g very cold salted butter,
finely diced
150g plain flour
80g parmesan cheese, grated
50g pine nuts, toasted
Freshly ground black pepper

Heat the olive oil in a frying pan and fry the onion and garlic and add the aubergine and the red and green peppers. When they have softened, add the courgettes, tomatoes and herbs, some salt and pepper, and cook for a further 10-15 minutes until cooked. While the vegetables are cooking, preheat the oven to 180ºC/350ºF and prepare the crumble. In a food-processor, or with your fingers, rub the butter into the flour and parmesan. When you have a mixture resembling breadcrumbs, mix in the toasted pine nuts and some pepper. When the ratatouille is soft and cooked, put the vegetables into a gratin dish, cover them with the crumble mixture and cook in the oven for about thirty minutes or until the top is golden and crispy. Serve hot or warm, with a crisp salad.

27.5.09

DB#31 or An Apple Strudel a day...

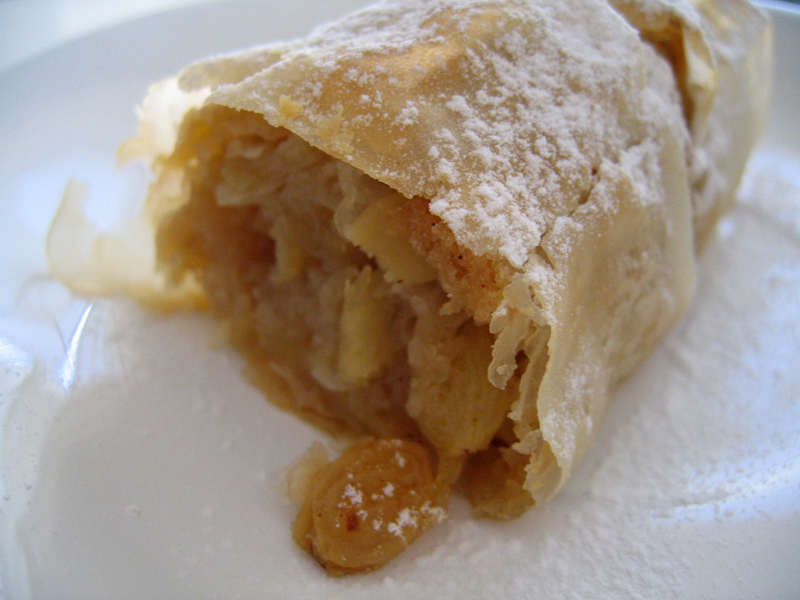
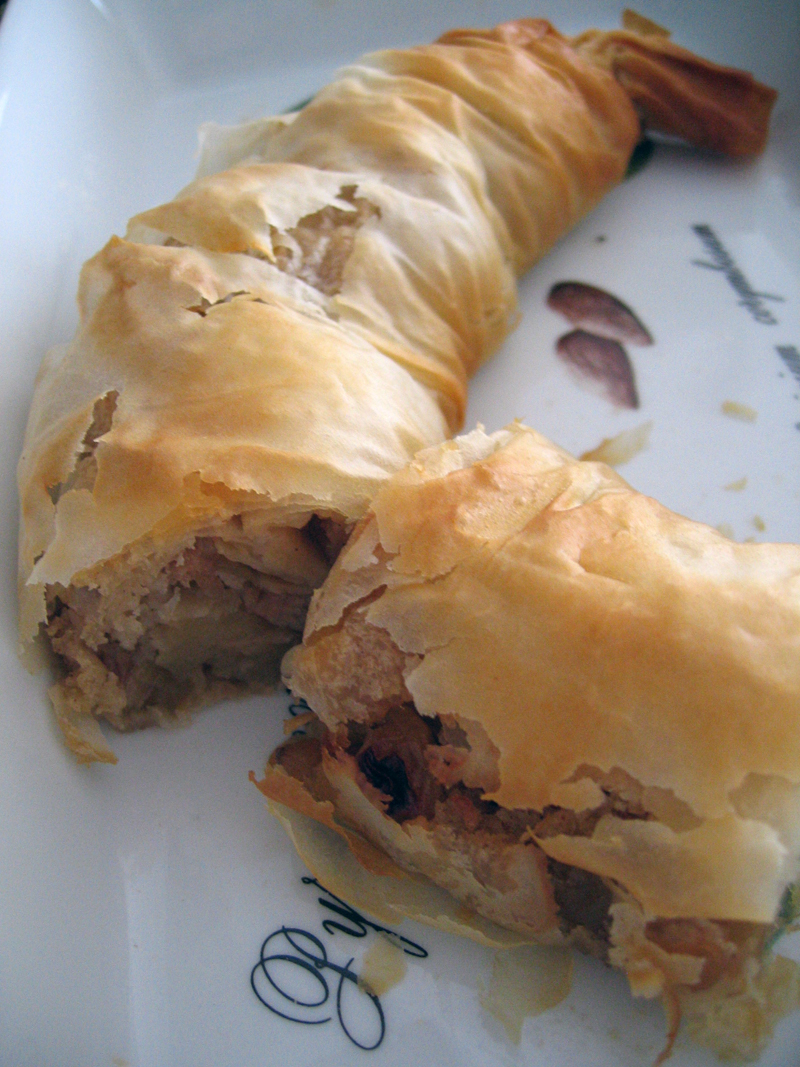
Apple Strudel

An Apple Strudel would certainly put a smile on my face any day of the week! Apple Strudel is not exactly the kind of dessert I grew up with, and I don't have many memories of this sweet but I've been baking strudels for a while now. This lovely theme for this month challenge with the Daring Bakers got me thinking of many possibilities, and how I'd try different fillings and approaches to a new favourite. Except I forgot my trip to a place not so far from the Cafés of Vienna, Budapest and Prague where Apple Strudel is baked everyday... Because of that I ended up going for the old traditional Apple Strudel, with further experiences postponed to another opportunity. Anyway, it's a wonderful recipe. Thank you Linda and Courtney!

The May Daring Bakers’ challenge was hosted by Linda of make life sweeter! and Courtney of Coco Cooks. They chose Apple Strudel from the recipe book Kaffeehaus: Exquisite Desserts from the Classic Cafés of Vienna, Budapest and Prague by Rick Rodgers.

Apple Strudel

Apple strudel
from “Kaffeehaus – Exquisite Desserts from the Classic Cafés of Vienna, Budapest and Prague” by Rick Rodgers

2 tablespoons (30 ml) golden rum
3 tablespoons (45 ml) raisins
1/4 teaspoon ground cinnamon
1/3 cup plus 1 tablespoon (80 g) sugar
1/2 cup (1 stick / 115 g) unsalted butter, melted, divided
1 1/2 cups (350 ml) fresh bread crumbs
strudel dough (recipe below)
1/2 cup (120 ml, about 60 g) coarsely chopped walnuts
2 pounds (900 g) tart cooking apples, peeled, cored and cut into ¼ inch-thick slices (use apples that hold their shape during baking)

1. Mix the rum and raisins in a bowl. Mix the cinnamon and sugar in another bowl.

2. Heat 3 tablespoons of the butter in a large skillet over medium-high. Add the breadcrumbs and cook whilst stirring until golden and toasted. This will take about 3 minutes. Let it cool completely.

3. Put the rack in the upper third of the oven and preheat the oven to 400°F (200°C). Line a large baking sheet with baking paper (parchment paper). Make the strudel dough as described below. Spread about 3 tablespoons of the remaining melted butter over the dough using your hands (a bristle brush could tear the dough, you could use a special feather pastry brush instead of your hands). Sprinkle the buttered dough with the bread crumbs. Spread the walnuts about 3 inches (8 cm) from the short edge of the dough in a 6-inch-(15cm)-wide strip. Mix the apples with the raisins (including the rum), and the cinnamon sugar. Spread the mixture over the walnuts.

4. Fold the short end of the dough onto the filling. Lift the tablecloth at the short end of the dough so that the strudel rolls onto itself. Transfer the strudel to the prepared baking sheet by lifting it. Curve it into a horseshoe to fit. Tuck the ends under the strudel. Brush the top with the remaining melted butter.

5. Bake the strudel for about 30 minutes or until it is deep golden brown. Cool for at least 30 minutes before slicing. Use a serrated knife and serve either warm or at room temperature. It is best on the day it is baked.

Strudel dough
from “Kaffeehaus – Exquisite Desserts from the Classic Cafés of Vienna, Budapest and Prague” by Rick Rodgers

1 1/3 cups (200 g) unbleached flour
1/8 teaspoon salt
7 tablespoons (105 ml) water, plus more if needed
2 tablespoons (30 ml) vegetable oil, plus additional for coating the dough
1/2 teaspoon cider vinegar

1. Combine the flour and salt in a stand-mixer fitted with the paddle attachment. Mix the water, oil and vinegar in a measuring cup. Add the water/oil mixture to the flour with the mixer on low speed. You will get a soft dough. Make sure it is not too dry, add a little more water if necessary.
Take the dough out of the mixer. Change to the dough hook. Put the dough ball back in the mixer. Let the dough knead on medium until you get a soft dough ball with a somewhat rough surface.

2. Take the dough out of the mixer and continue kneading by hand on an unfloured work surface. Knead for about 2 minutes. Pick up the dough and throw it down hard onto your working surface occasionally.
Shape the dough into a ball and transfer it to a plate. Oil the top of the dough ball lightly. Cover the ball tightly with plastic wrap. Allow to stand for 30-90 minutes (longer is better).

3. It would be best if you have a work area that you can walk around on all sides like a 36 inch (90 cm) round table or a work surface of 23 x 38 inches (60 x 100 cm). Cover your working area with table cloth, dust it with flour and rub it into the fabric. Put your dough ball in the middle and roll it out as much as you can.
Pick the dough up by holding it by an edge. This way the weight of the dough and gravity can help stretching it as it hangs. Using the back of your hands to gently stretch and pull the dough. You can use your forearms to support it.

4. The dough will become too large to hold. Put it on your work surface. Leave the thicker edge of the dough to hang over the edge of the table. Place your hands underneath the dough and stretch and pull the dough thinner using the backs of your hands. Stretch and pull the dough until it's about 2 feet (60 cm) wide and 3 feet (90 cm) long, it will be tissue-thin by this time. Cut away the thick dough around the edges with scissors. The dough is now ready to be filled.

My thoughts on the challenge:
- Both the filling and the dough recipe worked well.
- My strudel wasn't very pretty, and there was no time to 'make-up'! As said before I used the basic recipe without any different ingredients. In the end I was really happy with the overall taste.

Go and and I taste, I mean, a look at all Daring Bakers Strudels! ;)

16.5.09

On chasing dragons & waterfalls

Gibanica

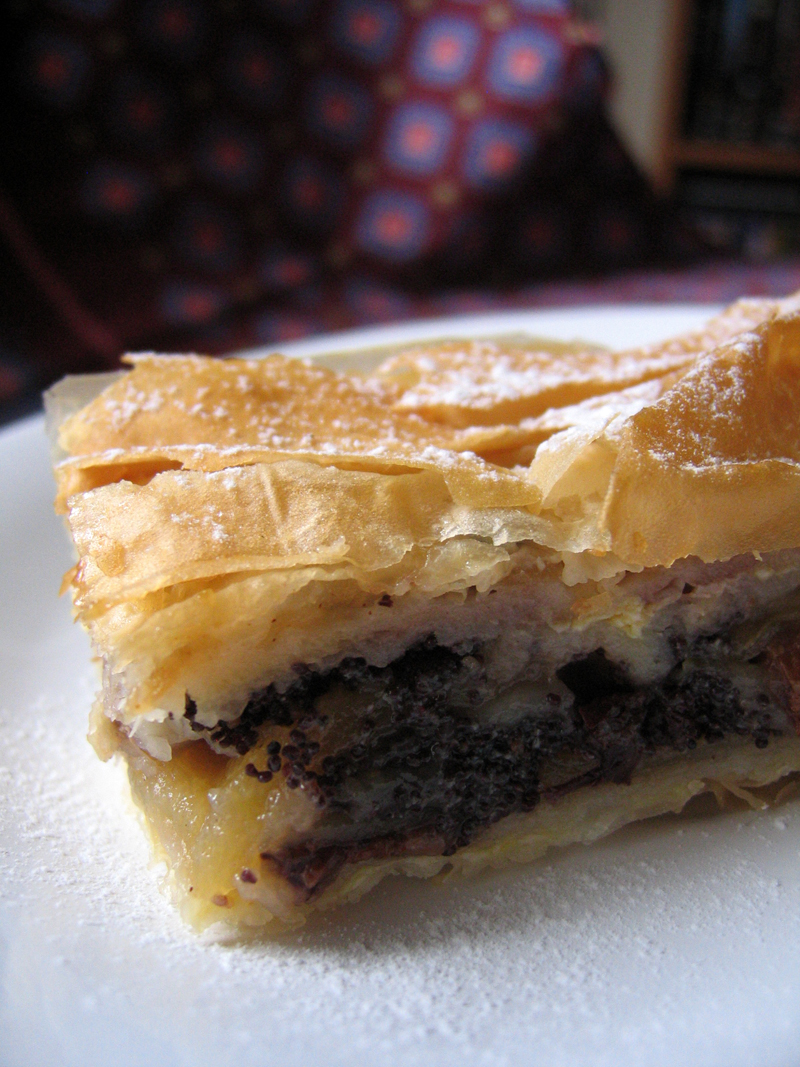
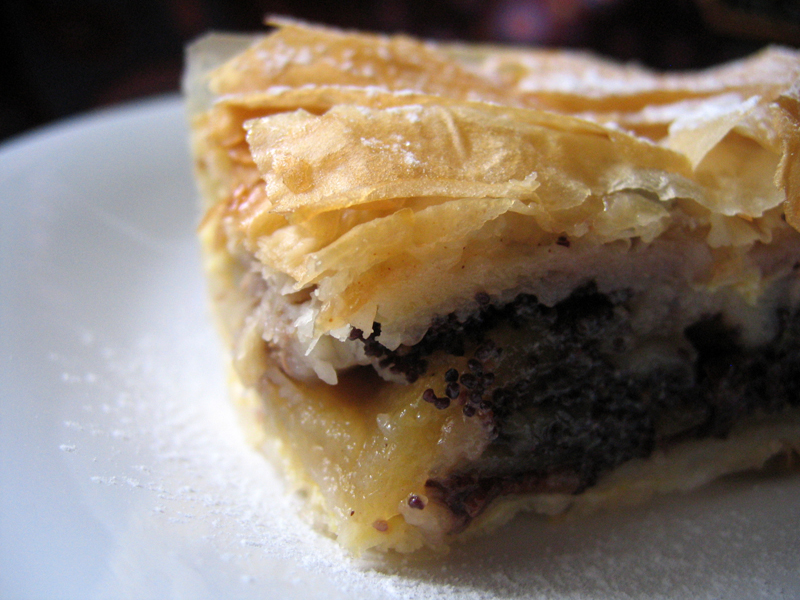
For those you know me, I'm on the rational side kind of person. I like to be in control of the situation, I love to plan, and I adore when everything comes together the way I've meant it to be. But reason will take you only until a certain point. After that is all about feeling... Emotion, reason and belief play a very important and meaningful role in our lives. Fear not, I will leave it at that! It's funny how we choose things, and how sometimes things seem to choose you. My personal bond with Slovenia was totally unplanned, and yet so special. One of the few souvenirs I've brought from Ljubljana was a cookbook (surprising, I know!) with slovenian recipes. I bought the book mainly because I wanted to bake a cake called Gibanica (aka 'moving cake'). Although Gibanica is a traditional dessert in the Balkan region - many different variations can be found in Serbia, Macedonia and Bulgaria -,Prekmurje gibanica is the slovenian national dessert.

We're off to Slovenia again - can't wait to chase Ljubljana dragon and waterfalls like this! In the meanwhile, grab a cup of your favourite coffee. I leave you with a slice of Gibanica. :)

Slovenia

Gibanica

Adapted from Heike Milhench's Flavors of Slovenia

8-10 sheets phyllo dough
3/4 cup poppy seeds
1 cup (250 ml) milk
2-3 small apples, peeled, cored and sliced thinly
1/2 cup raisins, soaked in warm water or rum, drained
1/2 cup sugar
1 tsp vanilla extract (or 1/2 vanilla bean, seeds scraped)
1 tsp cinnamon
Juice and zest of 1 small lemon (unwaxed, preferably organic)
680 grs ricotta or cottage cheese
2 large eggs
1 cup (250 ml) sour cream
1 cup walnuts, chopped
4 Tbsp butter, melted
Icing (confectioner's sugar) for sprinkling

Boil the poppy seeds in the milk until softened, about 20-25 minutes. Remove, drain, and set aside.

For the first filling, combine apples, raisins, sugar, vanilla (seeds or extract), cinnamon, lemon juice and zest in a medium bowl. Prepare the second filling separately mixing the cheese with the eggs and the cream, until smooth.

Preheat the oven to 150ºC (300ºF). Grease a rectangular baking pan. Place a phyllo sheet in the bottom, and brush with melted butter. Make sure the rest of the phyllo sheets are covered to prevent them to dry out. Spread a layer of cheese mixture over the dough. Cover with another sheet of phyllo, brush with butter, and spread a layer of raisin and apple mixture. Sprinkle with walnuts and poppy seeds. Repeat until you run out of fillings. Be sure to cover everything with 2 phyllo sheets. Brush the top with butter. Bake for 65-75 minutes or until golden. Remove from the oven, and sprinkle with icing sugar.

Gibanica

14.5.09

DC#1 - Do I Dare to Cook?

Ricotta Gnocchi with Minted Peas & Broad Beans

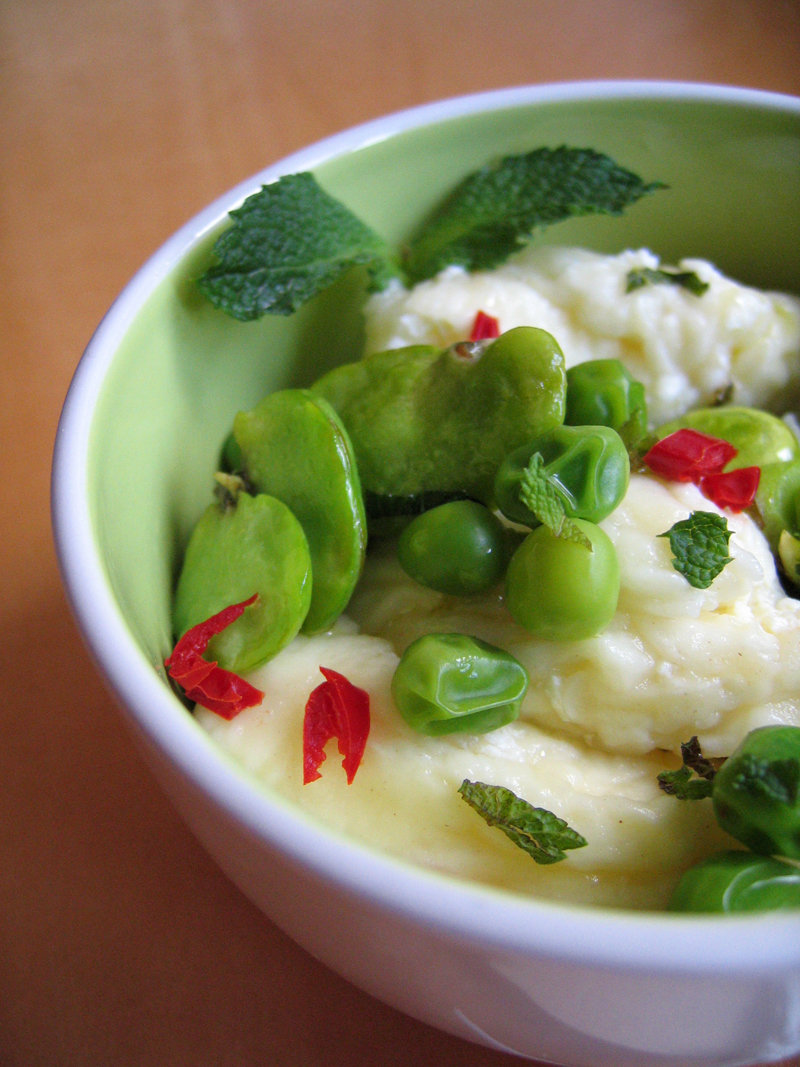
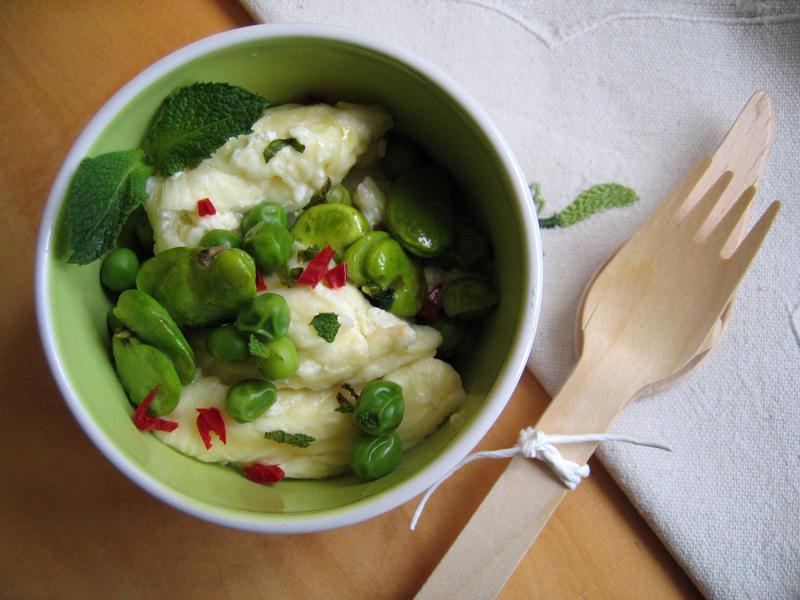
The Daring Bakers are a well known group of people who dare to... bake! The million dollar question is: do daring bakers dare to cook? This one does! I didn't have too much time to give this challenge a thought, so I just gathered what there was available in the fridge and (dared!) to cook us dinner. And it tasted nice. Almost forgot to say that the very first Daring Cooks' challenge is ... Ricotta Gnocchi! Major thanks to Lisa and Ivonne for everything they've done. Thank you Ladies!

Ricotta Gnocchi with Minted Peas & Broad Beans

Zuni Ricotta Gnocchi
The Zuni Café Cookbook.

Serves 4-6

For the gnocchi:
1 pound (454 grams/16 ounces) fresh ricotta (2 cups)
2 large cold eggs, lightly beaten
1 tablespoon (1/2 ounce) unsalted butter
2 or 3 fresh sage leaves, or a few pinches of freshly grated nutmeg, or a few pinches of chopped lemon zest (all optional)
½ ounce Parmigiano-Reggiano, grated (about ¼ cup very lightly packed)
about ¼ teaspoon salt (a little more if using kosher salt)
all-purpose flour for forming the gnocchi

For the gnocchi sauce:
8 tablespoons (227 grams/1/4 pound/4 ounces) butter, sliced
2 teaspoons water

Step 1 (the day before you make the gnocchi): Preparing the ricotta.
If the ricotta is too wet, your gnocchi will not form properly. In her cookbook, Judy Rodgers recommends checking the ricotta’s wetness. To test the ricotta, take a teaspoon or so and place it on a paper towel. If you notice a very large ring of dampness forming around the ricotta after a minute or so, then the ricotta is too wet. To remove some of the moisture, line a sieve with cheesecloth or paper towels and place the ricotta in the sieve. Cover it and let it drain for at least 8 hours and up to 24 hours in the refrigerator. Alternatively, you can wrap the ricotta carefully in cheesecloth (2 layers) and suspend it in your refrigerator for 8 to 24 hours with a bowl underneath to catch the water that’s released. Either way, it’s recommended that you do this step the day before you plan on making the gnocchi.

Step 2 (the day you plan on eating the gnocchi): Making the gnocchi dough.
To make great gnocchi, the ricotta has to be fairly smooth. Place the drained ricotta in a large bowl and mash it as best as you can with a rubber spatula or a large spoon (it’s best to use a utensil with some flexibility here). As you mash the ricotta, if you noticed that you can still see curds, then press the ricotta through a strainer to smooth it out as much as possible.

Add the lightly beaten eggs to the mashed ricotta.

Melt the tablespoon of butter. As it melts, add in the sage if you’re using it. If not, just melt the butter and add it to the ricotta mixture.

Add in any flavouring that you’re using (i.e., nutmeg, lemon zest, etc.). If you’re not using any particular flavouring, that’s fine.

Add the Parmigiano-Reggiano and the salt.

Beat all the ingredients together very well. You should end up with a soft and fluffy batter with no streaks (everything should be mixed in very well).

Step 3: Forming the gnocchi.
Fill a small pot with water and bring to a boil. When it boils, salt the water generously and keep it at a simmer. You will use this water to test the first gnocchi that you make to ensure that it holds together and that your gnocchi batter isn’t too damp.

In a large, shallow baking dish or on a sheet pan, make a bed of all-purpose flour that’s ½ an inch deep.

With a spatula, scrape the ricotta mixture away from the sides of the bowl and form a large mass in the centre of your bowl.

Using a tablespoon, scoop up about 2 to 3 teaspoons of batter and then holding the spoon at an angle, use your finger tip to gently push the ball of dough from the spoon into the bed of flour.

At this point you can either shake the dish or pan gently to ensure that the flour covers the gnocchi or use your fingers to very gently dust the gnocchi with flour. Gently pick up the gnocchi and cradle it in your hand rolling it to form it in an oval as best as you can, at no point should you squeeze it. What you’re looking for is an oval lump of sorts that’s dusted in flour and plump.

Gently place your gnocchi in the simmering water. It will sink and then bob to the top. From the time that it bobs to the surface, you want to cook the gnocchi until it’s just firm. This could take 3 to 5 minutes.

If your gnocchi begins to fall apart, this means that the ricotta cheese was probably still too wet. You can remedy this by beating a teaspoon of egg white into your gnocchi batter. If your gnocchi batter was fluffy but the sample comes out heavy, add a teaspoon of beaten egg to the batter and beat that in. Test a second gnocchi to ensure success.

Form the rest of your gnocchi. You can put 4 to 6 gnocchi in the bed of flour at a time. But don’t overcrowd your bed of flour or you may damage your gnocchi as you coat them.

Have a sheet pan ready to rest the formed gnocchi on. Line the sheet pan with wax or parchment paper and dust it with flour.

You can cook the gnocchi right away, however, Judy Rodgers recommends storing them in the refrigerator for an hour prior to cooking to allow them to firm up.

Step 4: Cooking the gnocchi.
Have a large skillet ready to go. Place the butter and water for the sauce in the skillet and set aside.

In the largest pan or pot that you have (make sure it’s wide), bring at least 2 quarts of water to a boil (you can use as much as 3 quarts of water if your pot permits). You need a wide pot or pan so that your gnocchi won’t bump into each other and damage each other.

Once the water is boiling, salt it generously.

Drop the gnocchi into the water one by one. Once they float to the top, cook them for 3 to 5 minutes (as in the case with the test gnocchi).

When the gnocchi float to the top, you can start your sauce while you wait for them to finish cooking.

Place the skillet over medium heat and melt the butter. Swirl it gently a few times as it melts. As soon as it melts and is incorporated with the water, turn off the heat. Your gnocchi should be cooked by now.

With a slotted spoon, remove the gnocchi from the boiling water and gently drop into the butter sauce. Carefully roll in the sauce until coated. Serve immediately.

My thoughts on the challenge:
- The recipe worked fine for me but I thought these were a pain to make... Bare with me, I've been working too much lately. ;)
- I've used half recipe, and it was more than enough for the two of us.
- Peas and broad beans (and a tiny little bit of chili) were all I added to the sauce, as well as a few finely chopped mint leaves.
- I thought the recipe was nice but not amazingly good.